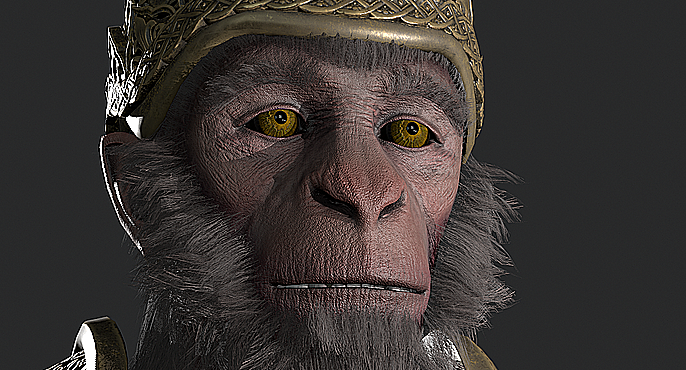
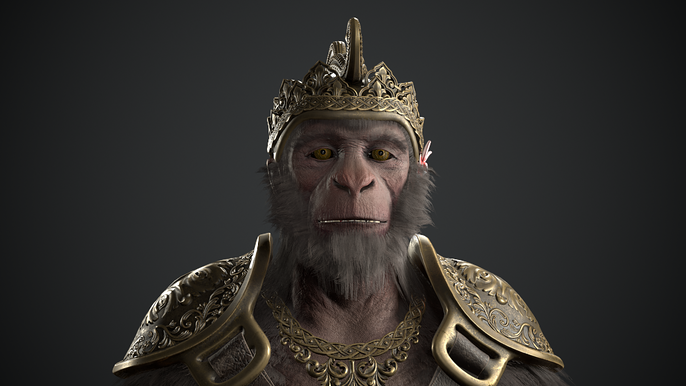
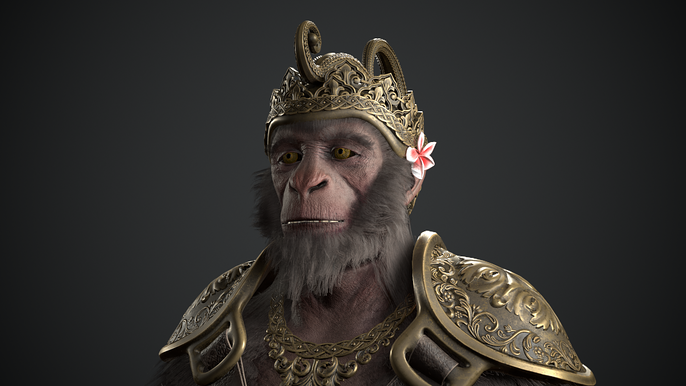
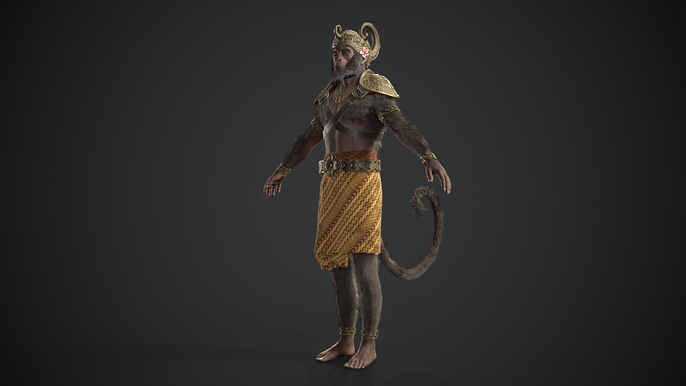
Hanuman, The Monkey God from The Hindu Epic Ramayana
I decided to enter Cubebrush’s Art War contest to challenge myself by creating and designing a realistic, game-ready character. I’ve always been fascinated by Balinese culture, so I decided to pick Indonesia as my country for the challenge. My goal was to bring to life one of the characters from their mystical legends: Hanuman, the monkey god from the Hindu epic Ramayana.
I knew this character was going to be a little different right from the start. Instead of beginning with a piece of 2D concept art, I used statues from Balinese temples as my concept.
I don’t recommend creating a 3D model without a 2D concept, but I did it as a personal challenge.
The character was sculpted and modeled in Blender, while I made its clothing in Marvelous Designer and added textures in Substance Painter. Lastly, I rendered the character in Marmoset. To get a more in-depth look at my creation process, let’s go over each step from start to finish.
Concept
It’s difficult to create a character without a concept, so naturally, my first step was to gather references for all the parts I needed for it. These “parts” included the previously mentioned statues and, in addition, real monkeys to understand their anatomy. I also searched for examples of monkeys from movies and other media to see how other artists took the physical form of a monkey and translated it into a 3D model.
To clothe my version of Hanuman, I borrowed inspiration from the traditional armor and clothing of Balinese nobility. Once I found all my references, it was easier to create some concept art.

Sculpting and Modeling
With my references and a concept in mind, I established the design and style for my character. The biggest challenge was in creating a realistic character that doesn’t exist in reality. The way I achieved that was by breaking up the character into parts I could find in the real world.
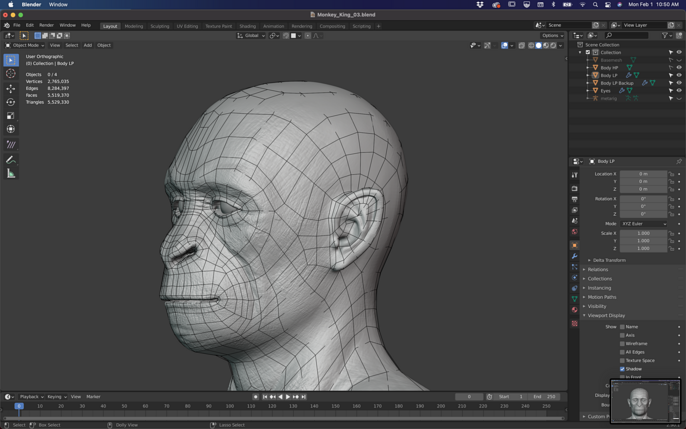
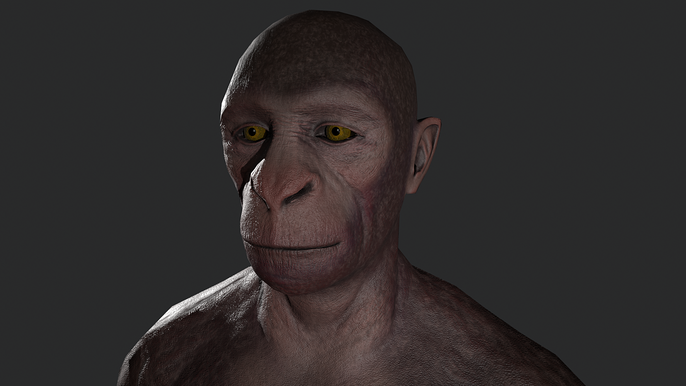
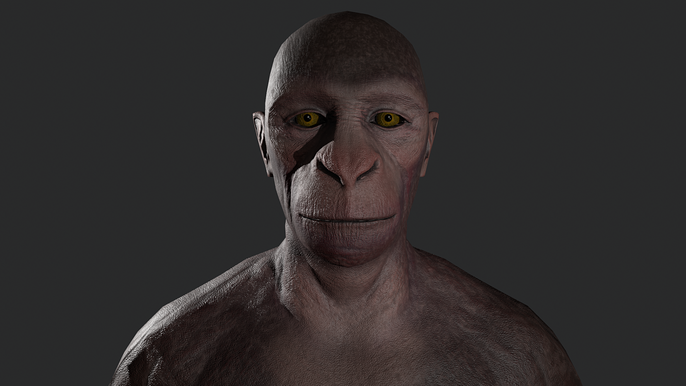
Hanuman is a monkey-like human, but I wanted to avoid making my version of him look like a human with a monkey’s head. I started with a human body and then sculpted in strong monkey features, blending them with the human features already present.
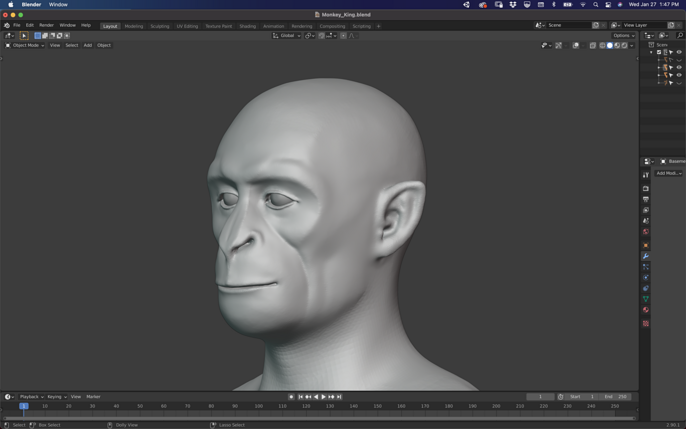
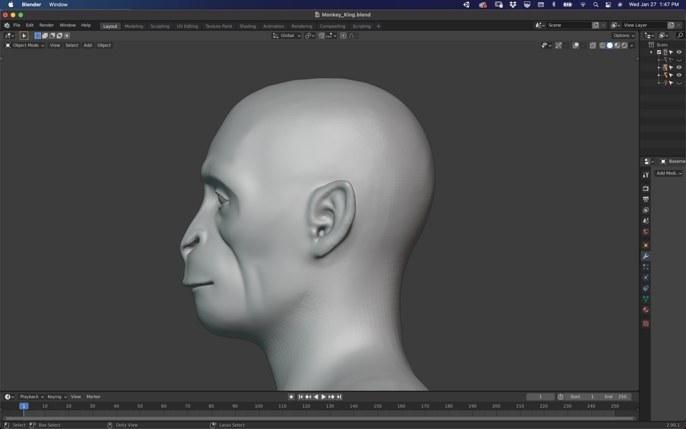
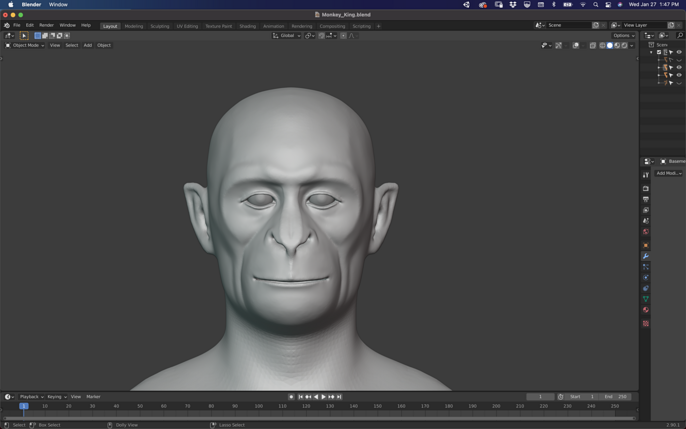
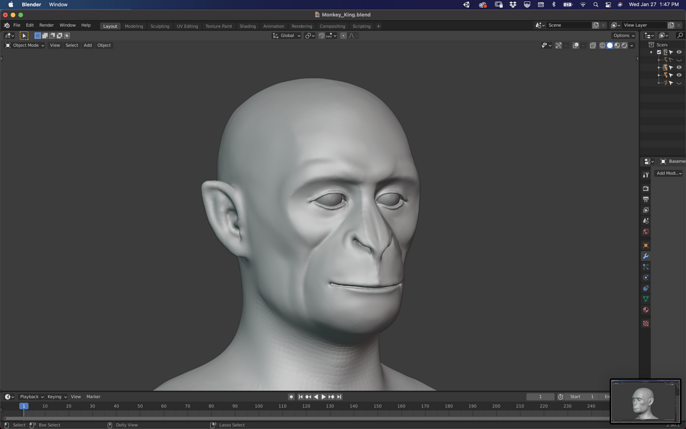
The type of monkey I used as my main reference was the macaque. The macaque is the most common kind of monkey found in Bali. Unlike other species of ape-like chimpanzees, macaques don’t have many features in common with humans. Finding a balance between the two was challenging.
I smoothed the stronger physical features of the macaque and mixed them with parts of the human anatomy. I paid special attention to the nose, mouth, and lips, while also focusing on the area around the eyes. Once I was pleased with the main shapes, I added more details to the face and body, such as wrinkles and other skin details. Those details helped to better sell my concept.


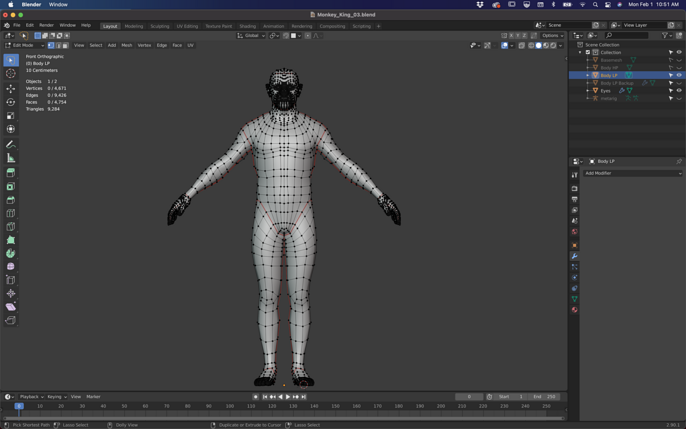
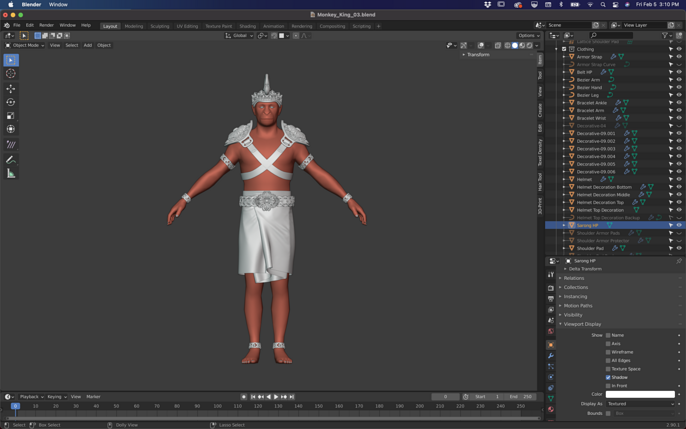
When my high-resolution model was done, I started the retopology process. I wanted to use my character in a game engine, so I tried to keep a low polygon count. I usually do this process manually in Blender. The high poly model had 5,510,762 triangles, while the low poly model had 5,690 quads (four-sided polygons).


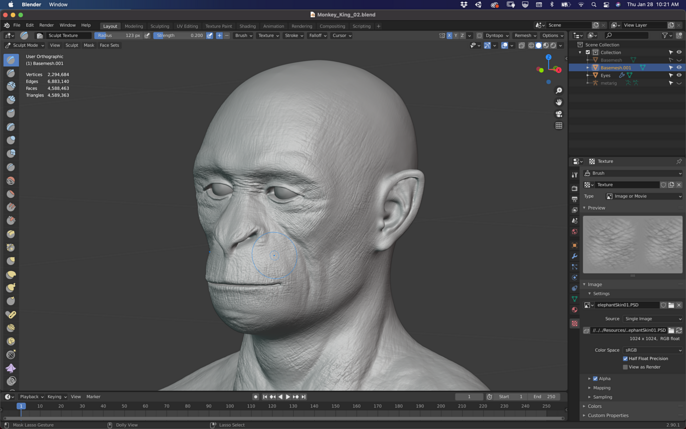
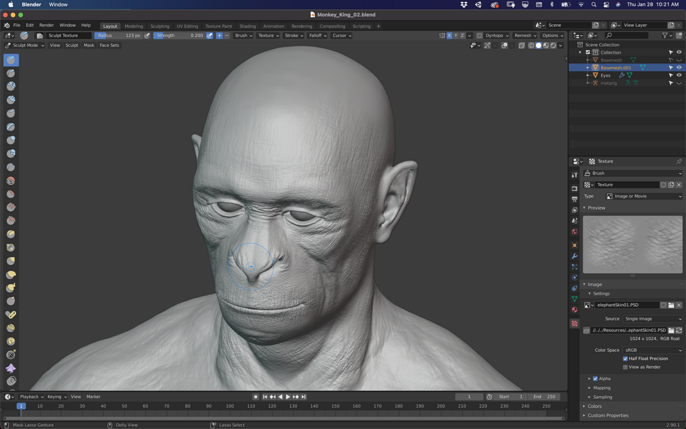
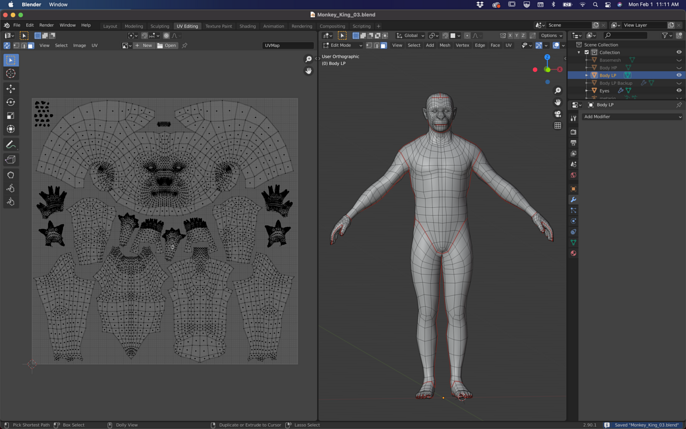
The next step was to texture my model. To prepare my model for texturing, I unwrapped it for UVs. I planned to split my model into different materials, addressing the body, mouth, teeth and tongue for one material, eyes was a second material, then hair, and finally clothing and accessories.
I made the face much bigger in the UVs because I wanted to render close-ups of his face and I needed a higher resolution.
Once I had the model unwrapped, I baked, or transferred the details from, my maps in Marmoset to check seams and see if all the details were captured. I used Marmoset because I could bake the whole model together, separate the meshes by groups, and then set whether they had influence over one another. That technique is especially useful for maps that involve ambient occlusion.


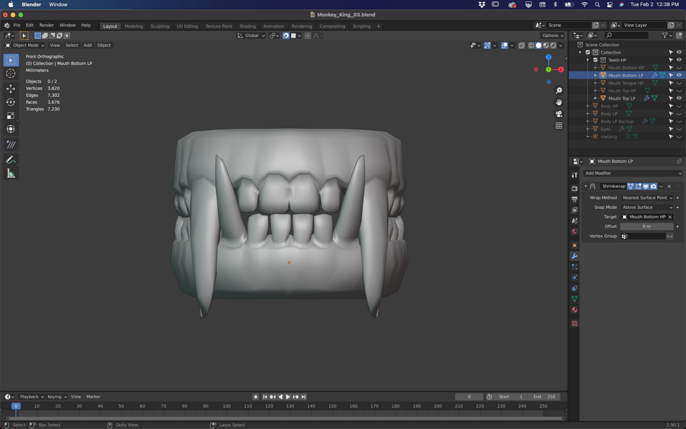
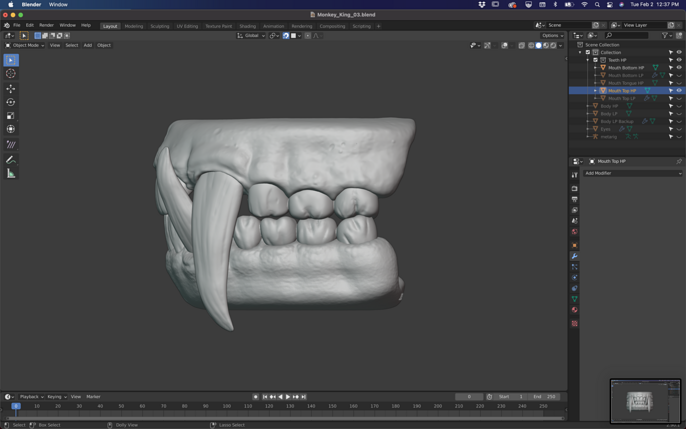
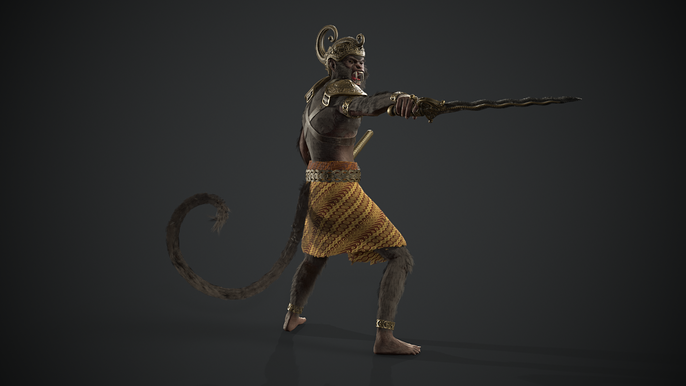
Next, I moved back to Blender to create the mouth and teeth. I planned for the final render to pose with an aggressive attitude and mouth open.
Here is where I used the macaque references again to understand the layout of their teeth. Macaques have large fangs, so I also had to study the mechanics of how their mouths open.


Accessories and Clothing
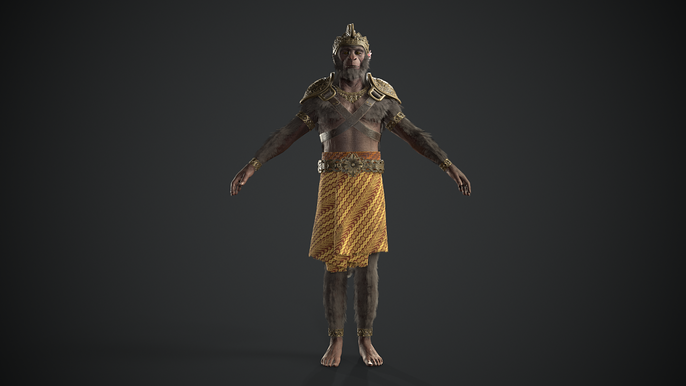
With the whole body modeled, the retopology process completed, and the model unwrapped, it was time to create the clothing and accessories for my version of Hanuman. I created the clothing in Marvelous Designer, which turned out to be quite simple. It involved a sarong–a tube of fabric that can be worn wrapped around the body–which is basically just a rectangle. The challenge was to recreate the sarong in the same way it’s worn.
After watching some videos on YouTube about how to fold and wear it, I followed the exact same process in Marvelous Designer to achieve the same folds. I learned that a sarong can be worn in different ways and that the same piece of cloth can be worn differently by men and women.
I think it’s very important when creating 3D art to research how something is used or made in real life. Doing that adds believability and accuracy to our models.


Then I followed the retopology process for the sarong by following GimpTOOT’s tutorial on YouTube. This video features a clever workflow that makes retopology easier and faster.


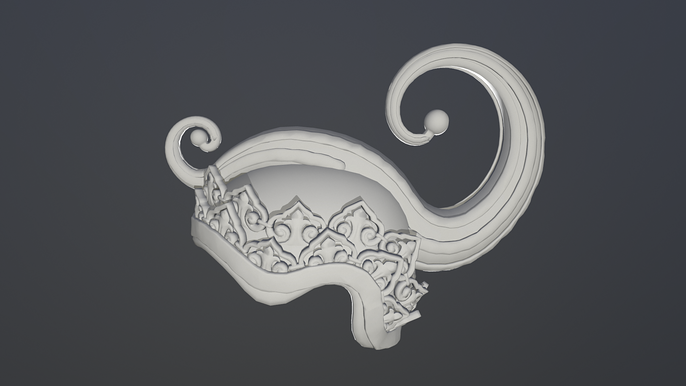
The next step was to create all the armor. This again was simple since it was just some shoulder pads and a helmet. I took inspiration from some old photos I found of traditional Balinese nobility. Their garments were beautifully designed with an insane amount of detail.
In Balinese culture, they are often inspired by nature and you can see that in their patterns. I used floral patterns for the armature and weapon.


There was some difficulty in using the detail created and captured in the high poly model with the low poly model. It took me a couple of attempts because to keep the detail, I had to use a higher count of polygons. I also wanted to have my model as optimized as possible.
Finally, I was able to optimize from 5,300,000 polygons to 27,000. I separated and organized all my meshes by materials and I was ready for texturing in Substance Painter.
Texturing
I started my texturing process with the skin. I used references from real monkeys and people to achieve a believable skin texture. Skin is difficult to get right because of its variations in complexity, color, and roughness. I followed Magdalena Dadela’s tutorial and adapted their technique to my needs and style.
I added some more details to reinforce the Balinese identity, such as the little flower in his ear. That was a plumeria flower, which is common in Bali. They’re used for ceremonies and offerings. As a part of the Art War challenge, I made the flower white and red like the Indonesian flag.
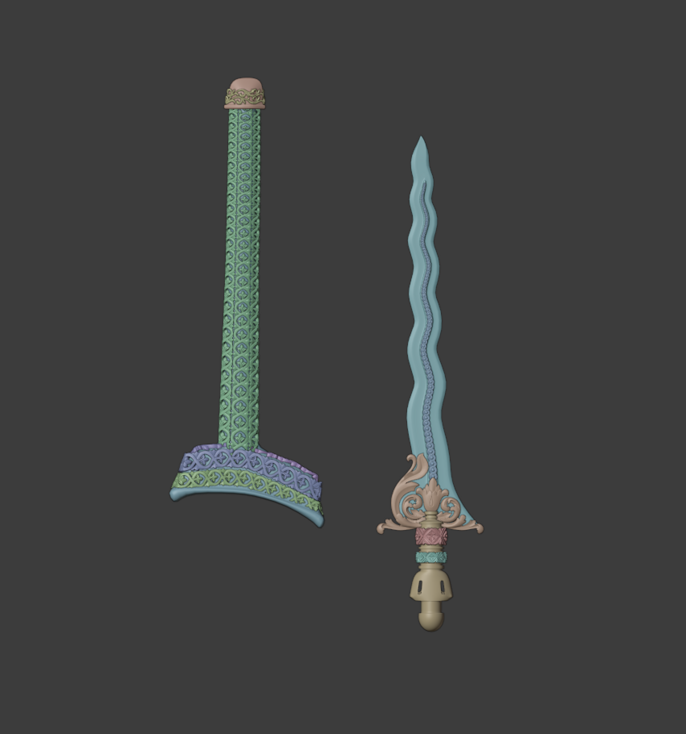
For his weapon, I recreated a keris, an asymmetrical dagger from Indonesia. Both weapon and spiritual object, the keris is considered to possess magical powers. I did some research about the weapon and learned that the blade, the handle, and the sheath were the three important parts of this weapon, so I paid special attention to them.
Fur
Finally, I started with the fur, probably the most challenging step. I wanted my character to be game-ready, so the challenge was to create all the fur as “hair cards.” I used an addon for Blender called Hair Tool that streamlined the process.
To achieve the desired result and keep a low polygon count, I had to start over several times. When I started to like the results, I was using too many cards, and when I was happy with the polygon count, the fur didn’t look good. Finding a balance was difficult and time-consuming.
Thanks to that addon I was able to create the hair textures, hair maps, and use different techniques to create the hair cards. I used curves and particles depending on the placement of the fur. Then I converted them to cards instead of having to manually place them. Finally, I got some results that made me happy.
Posing
The last part of the process was posing the character for the final render. Like before, I used references of monkeys showing aggressive behavior and angry human faces for their facials expressions. I used shape keys in Blender, which allowed me to add expressions in a non-destructive way, as the original geometry isn’t modified. I could blend the shape keys until I achieved the desired result.
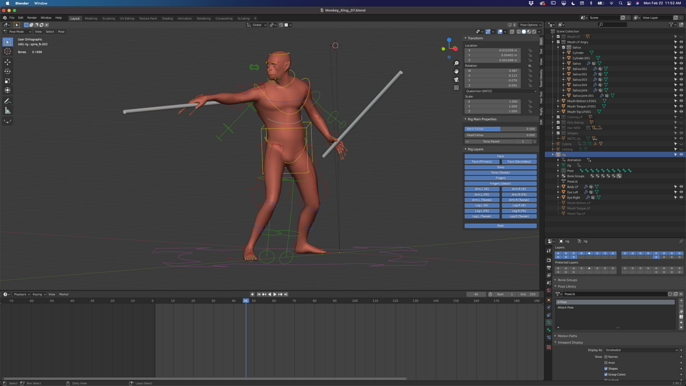

I rigged the character using the human armature and the Rigify addon in Blender to pose it. I used references again to develop a believable pose in combat.


When I was happy with the pose, I used Marmoset to render my images. Lighting is important for renders, so I followed pOiNtPuShEr’s tutorial. They give good tips for lit scenes.
Finally, I uploaded my character to Sketchfab and recreated the materials and lighting. You can see him in real-time and explore the topology and maps.
I would like to thank everybody who followed the process and invite them to share their thoughts in the comments. Thanks so much for reading!
Follow Dani here: