
3D Tutorial: Creating a Colt Single Action 45 by Emre Karabacak
Emre Karabacak is a 3D Environment/Prop artist from Berlin, Germany who takes us through the creation of a Colt Single Action Army 45- Peacmaker.
He graduated from the S4G School for Games in September 2017 with a Diploma in Game Graphics and currently looking for opportunities to utilize his skills.
His portfolio can be found here and you can find more awesome content from Emre on his Cubebrush store.
In the following breakdown / tutorial, I will explain everything from the Blockout to the end result in Marmoset Toolbag 3.

Searching for Reference
It was important to me to look at different reference images and gather inspiration for the ornamental pattern I would create for the metallic parts of the gun. To help me do that, I made a Pinterest board where I gathered all the reference images that seemed interesting to me. This is also especially useful for finding side views that will be used in the modeling process.

Blockout
When I started modeling, it was important to establish the proper dimensions of the gun.
To help me do that I created a plane with an image texture of a side view of the gun. I used that as reference for the Blockout model, which was created using a number of primitives that were modified until the rough shape of the gun had been established. It’s really helpful to look for details about the gun you’re making online to find out more about its properties and dimensions to get a better feel for the model you’re creating. Information on wikipedia or gun store pages are very helpful when you try to create a real life weapon as well.

Quad Chamfer Modifier Workflow
For the Quad Chamfer operations I used a third party script called “Quad Chamfer Modifier“ from Marius Silaghi, which has very handy options that are not available in the default 3DS Max Chamfer modifier.
I also highly recommend the akm tutorial by Tim Bergholz / Chamfer Zone
( https://chamferzone.com/tutori... )
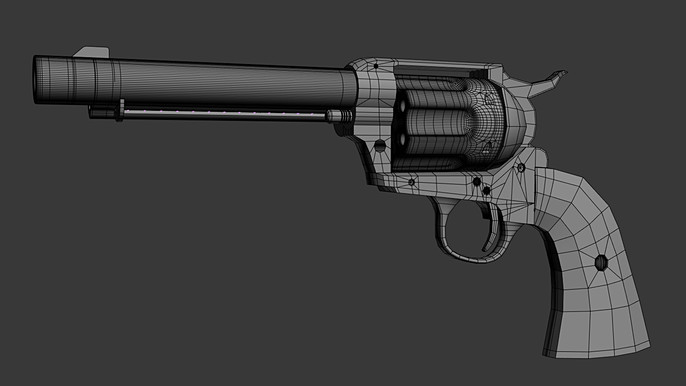
Now this workflow is very simple to understand. You define the polygons through smoothing groups and after applying the Quad Chamfer modifier it adds additional chamfering at the edges at which the smoothing groups meet. Then applying Turbosmooth with two to three subdivisions will result in a nice Highpoly.
Here is our mesh with predefined smoothing groups, ready to make use of the Quad Chamfer modifier.

Now after applying the Quad Chamfer modifier, I set the option “Chamfer by“ to
“Smoothing Groups” to create supporting edges between the smoothing groups.
I also set the sharpness and iterations to “1“.

And after applying Turbosmooth with two or three subdivisions, this is our end result for the Highpoly.

Base Mesh
After finishing the Blockout, it’s important to include all the features of the gun in the Base mesh. That means all the details should be present in our base mesh, since it will be used as the base for the highpoly.
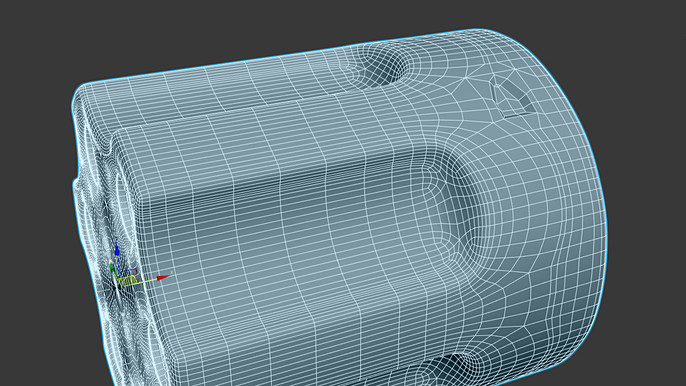
For the more complex parts like the drum, I placed the supporting edges and applied two subdivisions to create a more high poly mesh, so I could add the smaller details without destroying the rounded shape of the cylinder.
This is my base mesh with defined smoothing groups for the Quad Chamfer modifier.

The next step was to use the Quad Chamfer modifier with the option “Chamfer by Smoothing Groups”, with iterations and sharpness set to 1 to get the supporting edges for the drum.

Now I added a Turbosmooth modifier and an Edit Poly modifier above it so I could edit the geometry.

Now there was enough geometry to add smaller details and define their smoothing groups accordingly.
Now I applied the Quad Chamfer modifier to give the details the required supporting edges.
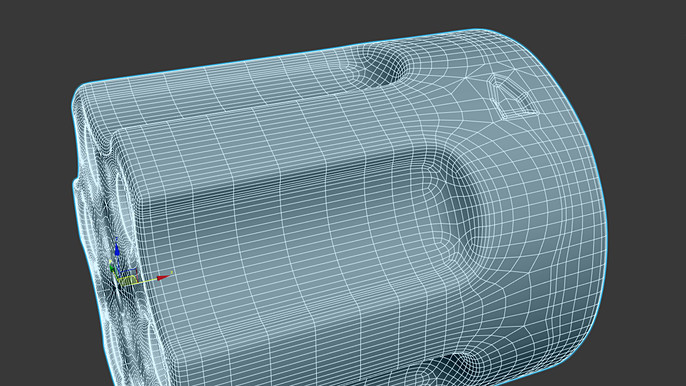
At the end, the object gets an additional Turbosmooth modifier with one or two subdivisions.

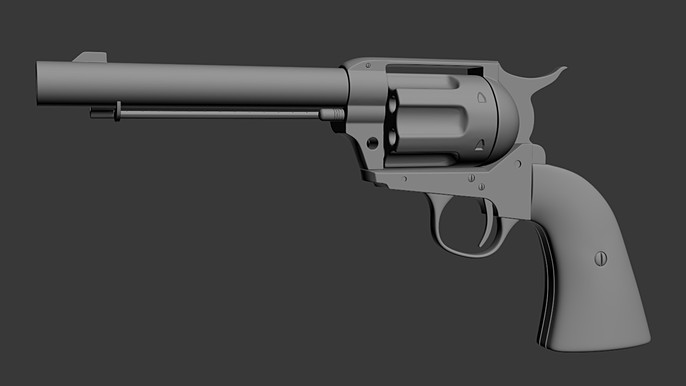
Base High Poly
Once I was finished with the process of creating the High Poly model, I had a clean version of the Colt, only missing the ornamental patterns. Those would be created later using Substance Painter.
Material Color / ID
Before I could export my High Poly, I had to define the different materials by color. In this case, all the blue parts would be metal and the red ones would be wood. This would be useful later on, to bake a color ID map in Substance Painter, to mask the separate materials.

Low Poly
After finishing the High Poly, I created a Low Poly version of it accordingly.
When doing this, you decide on how high of a resolution you want your mesh to have. For example, a first person shooter game is going to need a higher resolution model than a third person shooter, simply because the gun is going to take up a lot more space on the player’s screen.

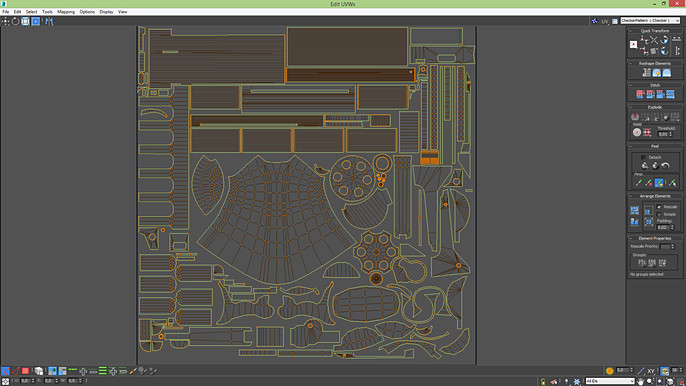
Unwrapping in 3DS Max
For the Unwrap it was important to have the stripes be as straight as possible and to leave little free space on the UV for an optimal result.
To learn more about this I highly recommend the Unwrap Special Tutorial by Tim Bergholz/Chamfer Zone:
Baking Textures in Substance Painter
I decided to also use Substance Painter for the baking process because it allowed me to see the baked textures on the model instantly in the viewport and I could start painting the model directly. The option “Match by Mesh Name” is especially useful because it allows you to bake models with multiple parts without the need to explode it beforehand. As the name suggests, it separates your mesh by name, which eliminates possible intersections between the cage and your objects you’re baking.
For this model I baked all my textures in 4K so I’d have them in a high resolution. I could still downscale them later if I had to.

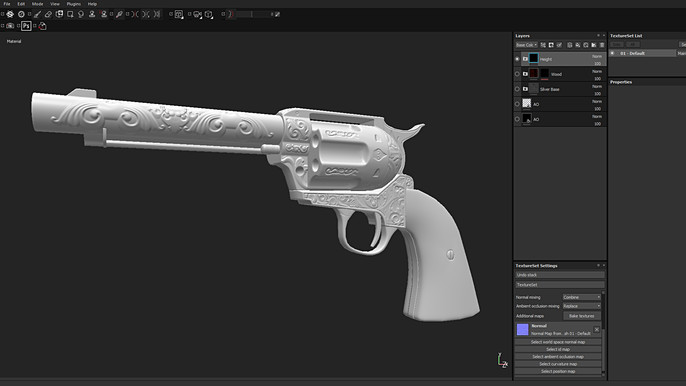
Adding Alpha Details in Substance Painter
The next step was to add the ornaments. For that I created a Fill Layer with only the height information’s positive value. Then I created a black mask for the layer, with which I could paint in the layer mask using the Alpha, so only those spots would use the height information. There is a very useful tutorial on how to use the Alphas on Jonas Ronnegard’s Artstation page.
The ornaments I used are from Jonas Ronnegard’s “Ornament Brushed/Alphas” pack
( https://www.artstation.com/jro... ).
The next step was to make it so the Information we created would be recognized by the Smart Materials as well. Josh Dina made a very good tutorial where he explains how that works.
The tutorial by Josh Dina:
( https://www.artstation.com/art... )
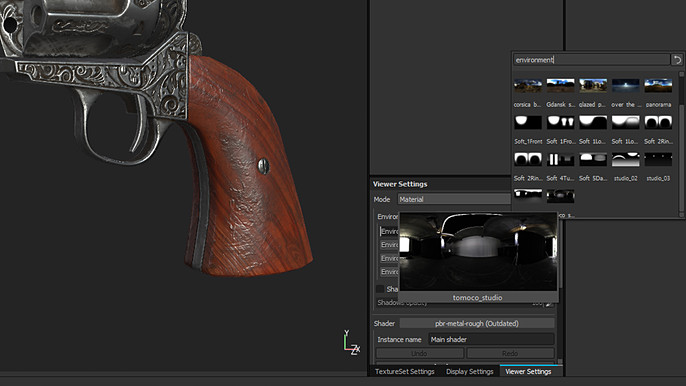
Viewport Lighting
I recommend using a neutral Environment for the lighting when making the textures, for instance a Studio Shot. This means that there are no other colors that could affect how the materials look in the viewport.
Texturing in Substance Painter
When starting it’s important to set up the basic materials of the object.
Using the color ID map, you can separate the folders in Substance Painter according to the different materials you have. The first texturing pass is always going to be clean.

After the material set up follows the dirt/grunge pass. I used several Smartmask generators to add ambient occlusion or cavity dirt. One thing I recommend is to always edit the generated maps so you can no longer recognize that it was procedurally generated.

Rendering in Marmoset Toolbag 3
In this segment I will go over Marmoset Toolbag 3 and its render and camera setting.
For game assets, I recommend trying to render it in the Engine instead of the Viewer.
Marmoset Toolbag 3 comes with some easily understandable settings to quickly realize an asset in a scene. It is also possible to export the scene in a 3D viewer that you can upload to Artstation, which is very useful.
Camera Settings in Toolbag 3
The camera settings for my rendering were kept pretty simple. One thing I thought was really useful is the ability to use a backdrop which can be added via “Scene -> Add Object -> Backdrop”. You can then blur the backdrop using depth of field, to not distract the viewer from your asset too much.
I usually set the field of view to around 22 to 25 degrees and use the Safe Frame function to see how the asset is going to look rendered in the end. For the remaining Post Effect settings you can check out the screenshot below.

Render Settings in Toolbag 3
The render settings in Toolbag 3 are very powerful.
In my case, I doubled the resolution and set anti aliasing to x4.
In terms of lighting, I activated local reflections as well as High Res + Front Face shadows.
The ambient occlusion strength was set to 3.0 and the occlusion size to 0.03.
The settings you’re going to use always depend on the model and your personal taste on how you want it to be displayed.
To add a finishing touch to your model you can use Global Illumination. This makes light rays bounce between the different objects on your model and makes your lighting look more convincing. You can adjust the brightness and area of your scene via the settings.

Final Rendering
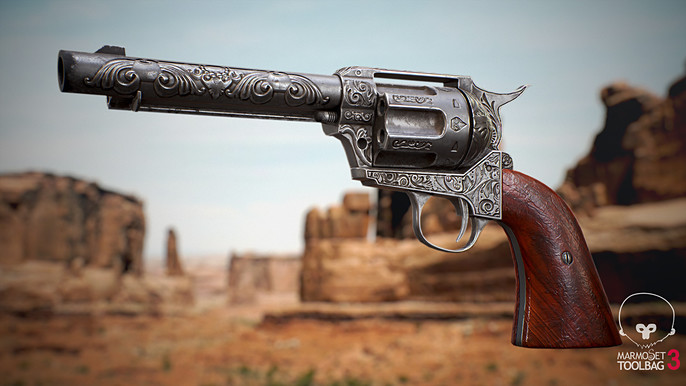
Big thanks to Cubebrush and Marc Brunet for making this tutorial possible!
Furthermore I’d like to thank Kevin Skok and Simon Trümpler who inspired me to create this asset and Tim Bergholz/Chamferzone for his tutorials and helping me out in the past.