
Strategies for Achieving Modularity in Modeling and Texturing by Serenity Forge
Serenity Forge is the studio behind games such as Where the Water Tastes Like Wine, The King's Bird, Once Upon a Coma, Lifeless Planet and A Case of Distrust. The studio was founded in 2014, based out of Boulder Colorado, with the mission to create meaningful, value driven games that challenge the way people think. One of the studio's founding principles is that games can be powerful tools to teach and motivate. The near death experience of Serenity Forge's CEO and founder, Zhenghua Yang, inspired the company's mission and its first game, a free non-fictional visual novel called Loving Life.
At Serenity Forge we promote positive thinking and ambitious mindsets. Over the years we have built up a versatile and passionate team of programmers and artists, and we value our close-knit team structure as one of our studio's greatest strengths.

I am the Director of Development at Serenity Forge. I am a proud graduate of the Savannah College of Art and Design with a BFA in Visual Effects and a BFA in Game Design. I have been working with Serenity Forge for about 4 years now. I started off as a Generalist Artist then became the Art Director, and am now the Director of Development for the studio. I specialize in 3D and technical art but I have a versatile skill set that allows me to contribute to projects in a wide range of roles. Most of what I do now-a-days is project management, workflow and pipeline planning, and creative direction.
I like to think of myself as an artist, but I am very much a technical person at heart. I love working in the game industry because it gives me the opportunity to create worlds and tell stories through interactions rather than words or drawings. I like to be a part of projects that awe and inspire. With everything I do I try to bring emotion and depth not just into the concept, but into the core functionality of a project, making the way something works enhance and compliment the way that it looks.
Modular Asset Workflow
The goal of a modular asset workflow is to create a set of assets that will allow you to use the least amount of resources to achieve the most amount of variety. A good modular asset set will allow you to create an environment or structure in a huge variety of configurations with a relatively small amount of effort and assets.
A modular asset workflow will minimize repetition in resources and maximize reusability of those resources. A rule of thumb for a modular workflow is if you find yourself repeating something it could probably stand to be more modular.
In this article, I will give some pointers on how to design a modular asset workflow that can work well for a wide range of projects. I use an example of a 3d modeled building, but the concepts of modularity can be applied to many disciplines in game design. No matter what your role on a project, be it animator, programmer, concept artist or 3d modeler, you can work modularly by finding ways in which you can maximize the utility, diversity, and flexibility of your work.
Planning
What Assets You Need
Before you even start making assets, you should have an overall idea of the types of assets you will want to make, and how they will need to fit together. Planning out your assets and finding ways that they can be reused in various ways is paramount to an effective modular asset set.
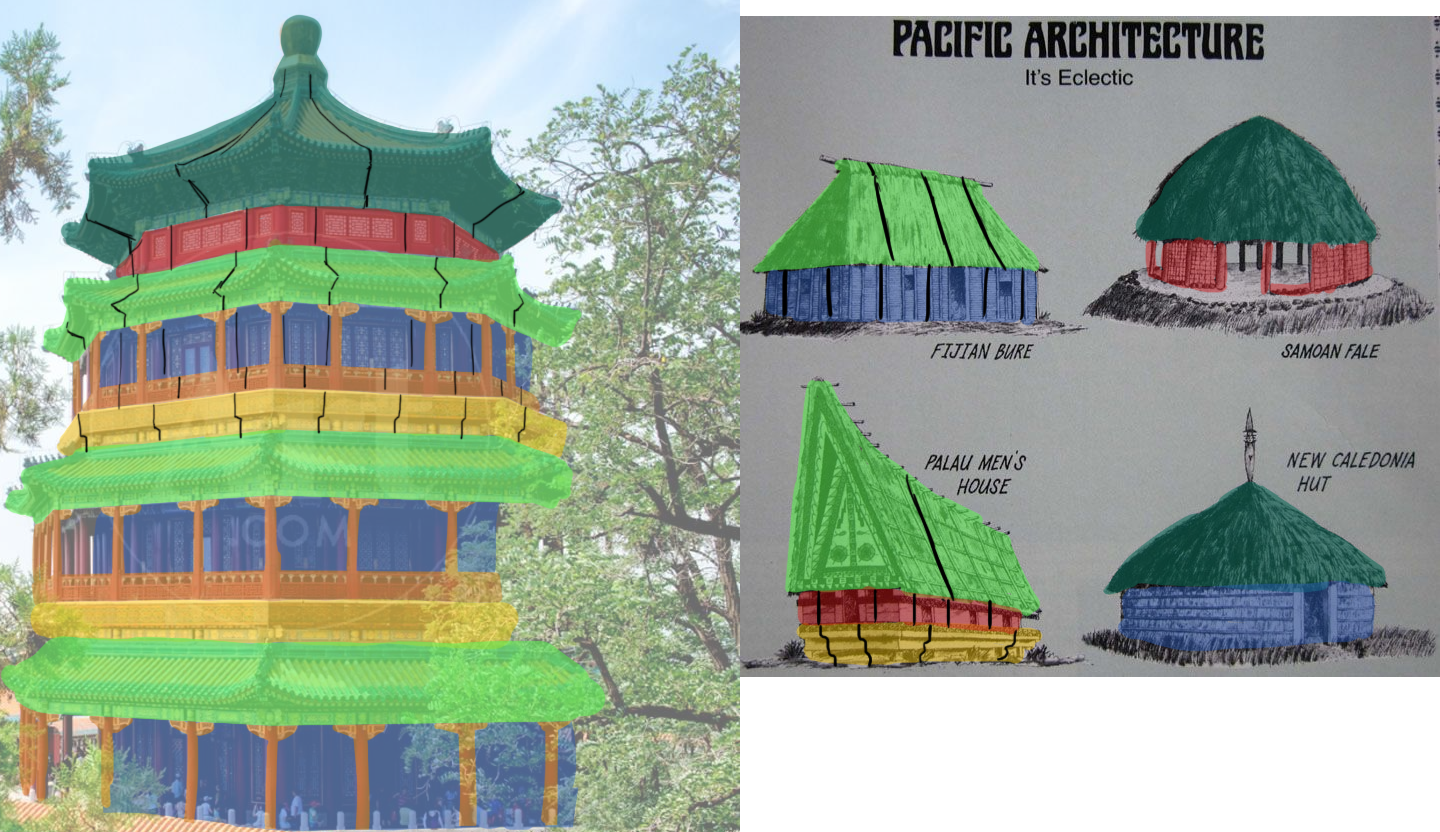
One way to start is to take a reference image or drawing and analyze it to see what elements are repeating. Section it out and figure out how you can divide up the repeated elements to create modular assets. This will give you a general idea of the pieces you need to make, how your various pieces will come together, and the types of configurations you can make with those pieces.
For my asset set, I want to create some architecture that has stylistic inspirations from Asia and the Pacific Islands. I found some reference images to go off of, and started color coding the repeating forms that I saw. I made some parallels between the two images to illustrate different ways in which I want to be able to put the assets together to create different types of forms. For example the green roofs on the left and right images are very different, but I know that I want to have a set of assets that would allow me to create configurations similar to both.
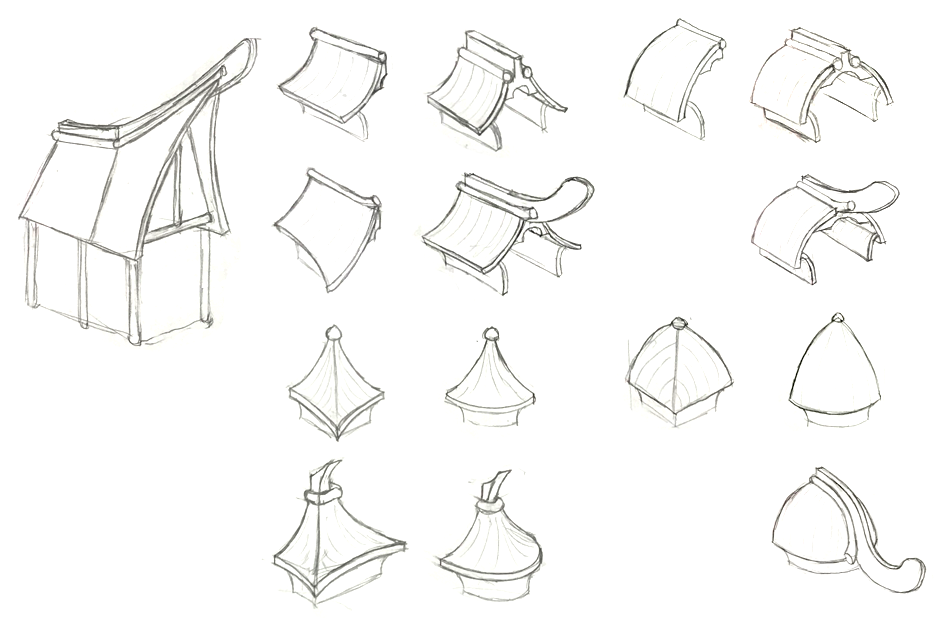
After you have a general idea of the pieces you will need, it is a good idea to sketch them out. Doing some basic sketches or even very basic 3d mock-ups will help you plan your workflow.
How Pieces Meet
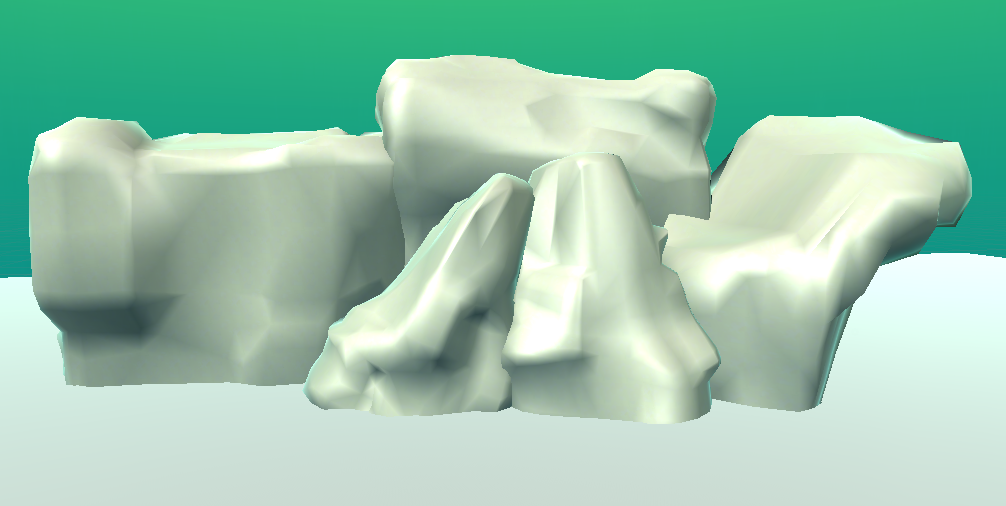
It is important to plan early on how you want your pieces to connect with each other. Sometimes, you can simply layer pieces on top of each other to either cover up or obscure the seams. This solution is used most often in assets like rocks or foliage that do not need to line up perfectly to still look natural. One could also use objects like columns, beams, or pillars to hide the seams of walls.
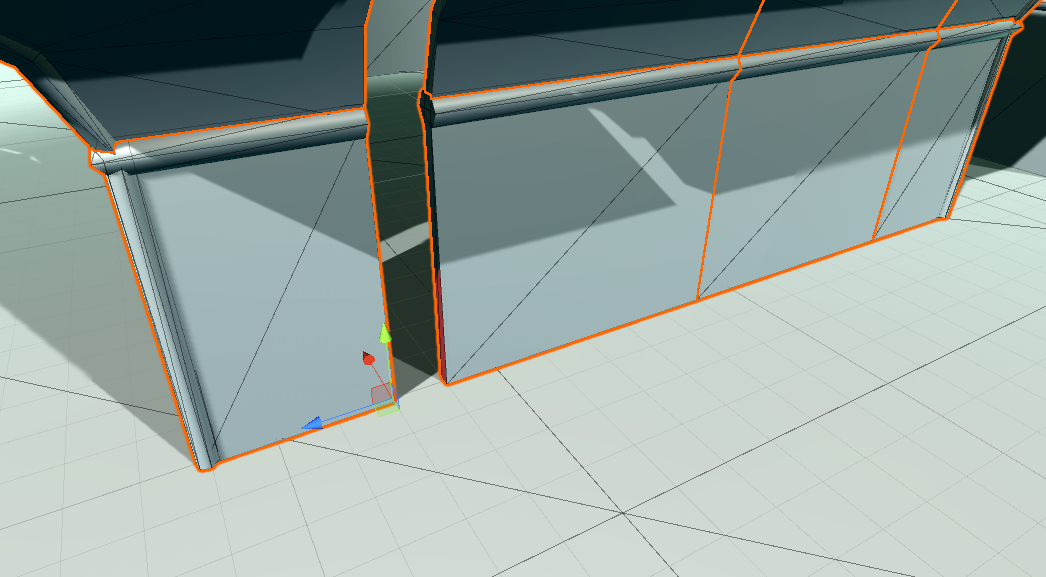
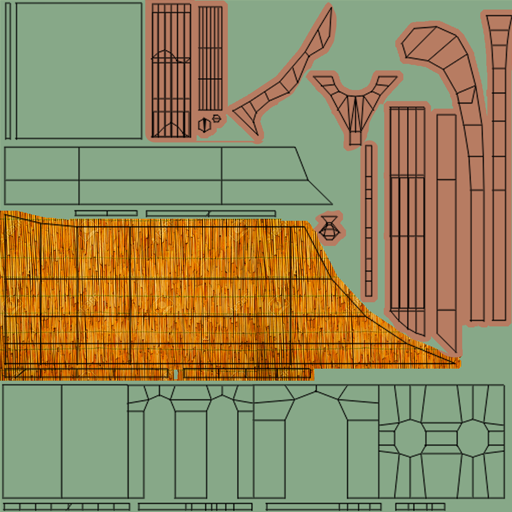
Many times, however, your assets will need to fit seamlessly together. In these cases, it is important to know what your edge cross section between pieces will need to look like. If you have a consistent edge cross section between multiple pieces, you can ensure that they will all fit together interchangeably.
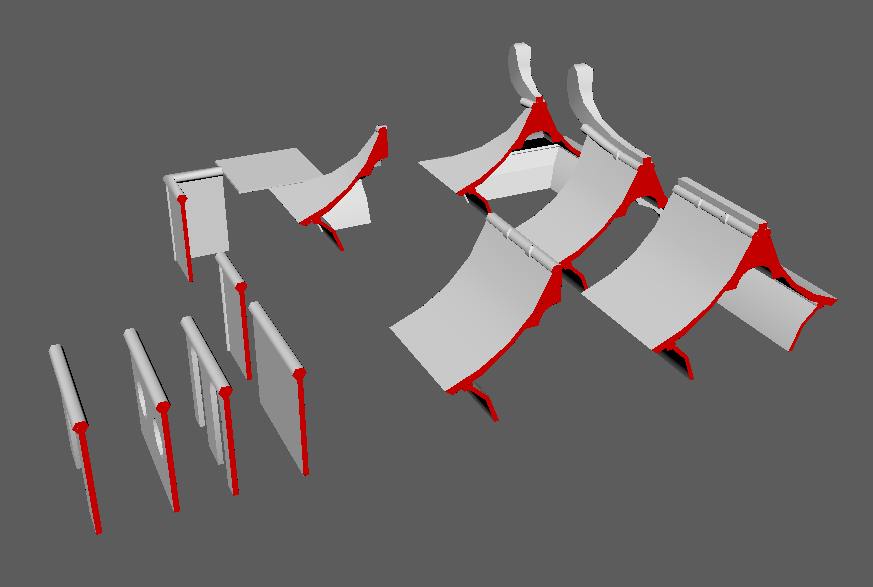
Highlighted in red below are the cross sections for the asset set that I have made. As you can see, they have the same cross sections in all places where the pieces would need to seamlessly meet.
Obey the Grid
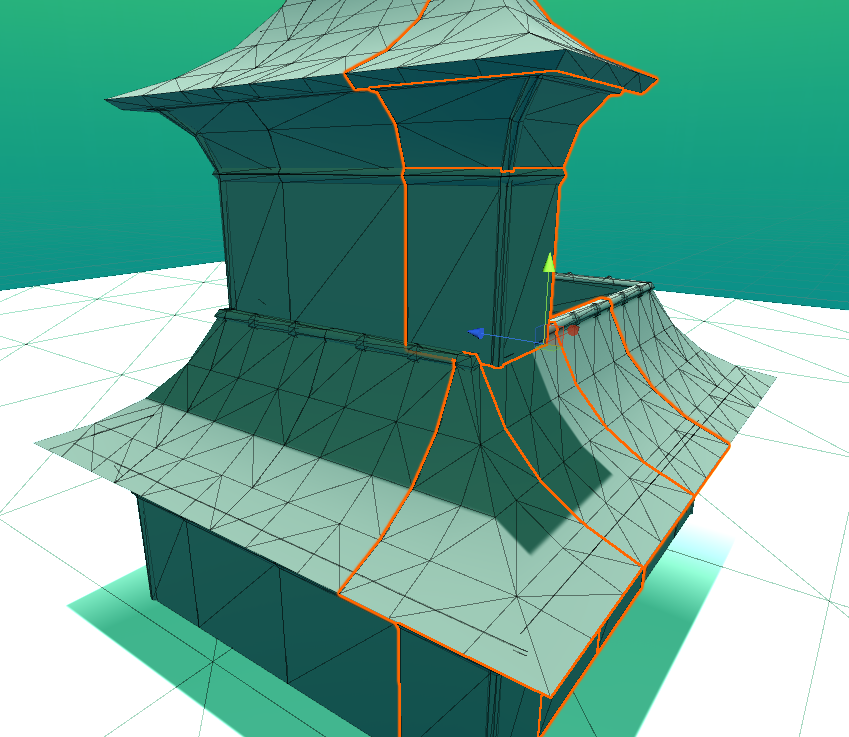
For most modular asset sets, adhering to a grid is of paramount importance. Adhering to a grid will ensure that your pieces can be used interchangeably, that they will all fit together properly, and ensure that using the assets is more efficient. Different modeling packages and engines have different grid units, so be sure to do some experimentation on your workflow to figure out the best scaling options for your project.
When you obey the grid, you can turn on the snapping tools in your 3d modeling tool and/or engine to quickly and easily snap pieces seamlessly together. In my assets below, all of my pieces are made to snap to single units. Each piece has edges that align to the grid, especially where pieces need to meet seamlessly.
Start Simple, Test as Soon as Possible
Creating an entire modular asset set can be daunting. Especially if those assets are complex and detailed. For this reason it is important to A) Start simple, and B) Test as soon as possible.
Start simple by creating only a couple assets. Start with the most versatile and repeatable assets. Keep them very low detailed, and simple. Basic geometric shapes are best. Keeping your models simple will ensure that you are not wasting time adjusting minute details when you realize that something needs to be adjusted. You can always go back and make the assets more detailed later on.
For an efficient workflow, I highly encourage and recommend that you test your assets in an engine, or make sure that you are using reference meshes in your 3d program. It is important to have a workflow that ensures that when you are updating one mesh, it will also update all instances of that mesh, so that any test structures you have made will automatically update to show the new results. Having to re-create test structures after each edit or adjustment is a woefully inefficient workflow.
Test your simple assets as soon as possible, even as early as 2-4 pieces in. Start using your assets to create various configurations as soon as you have enough pieces to do so. This will help you to figure out grid, alignment, and scaling issues early in the process, so you can avoid having to adjust all your pieces later on.
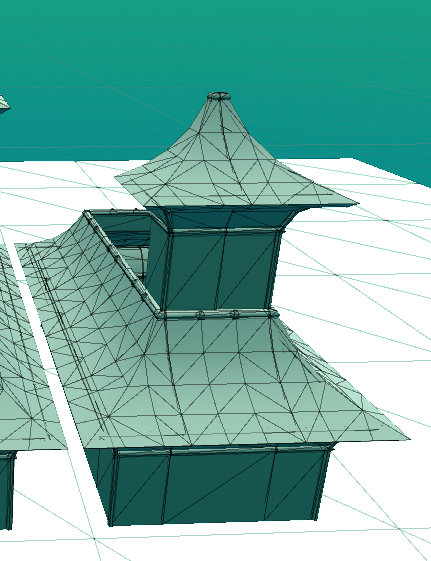
In the image below I only have 4 pieces. However, because I tested early, I was able to realize that I had a grid alignment issue that made the second tier of my building just one unit too long. This was because I was using a 5 unit grid, which cannot be halved while remaining on the grid. So, I changed my workflow early on to work with a 6 unit grid instead. Catching this early on saved me a lot of potentially wasted time.
Testing early will also help you figure out what additional pieces you will need, and which are the most important to make. There are likely to be some very important assets that you had not thought to make during your planning. Testing early and often will help you to realize what assets you have overlooked.
It is also likely in planning that you will design pieces that end up not being as useful as you initially intended. By working with your pieces early on, you can see which pieces become necessary or useful the soonest. If you catch yourself thinking, “I sure wish I had this asset right now”, you know which asset to make next. Testing will help you prioritize the most useful pieces, and realize which may need to be scrapped or cut.
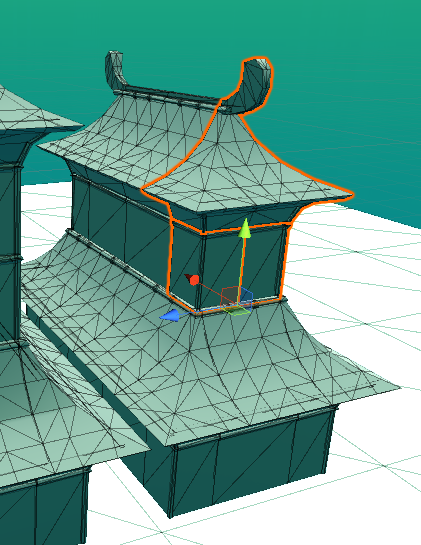
In the images below, very early on in my testing, I started putting 2 corner roof pieces next to each other. This made it apparent to me that double roof and cap assets that I designed would be the next most useful assets for me to create.
Texture and Material Modularity
Loading in textures can be some of the most heavy lifting that a game engine needs to do. Not to mention textures can be very time intensive to make. For these reasons it is important to create the most reusable and modular textures possible.
When laying out your UVs, try to layer as much as possible. It is likely that most or all of the pieces in your set should share the same material or materials. Figure out what sections of the various pieces will use the same part of a texture and layer them on top of each other. This will not only save you time on texturing, but will also ensure that seams between pieces are more consistent.
After creating some UV shells, make some initial color passes on your texture to start to figure out how much space you will want to alot to each surface in your set. Know how much texture space you want to to allot to each part.
As you can see below in my texture, I have the most space allocated to the roof texture, which makes sense since it is the most prevalent part of my structures. I also have a lot of space dedicated to the walls. However, in my model there is relatively very little of the brown parts that are actually visible. Yet the brown in my texture takes up almost a fourth of my texture space. This makes it clear that I need to revisit my UV texture space allotment and make some more efficient choices for the brown parts. Perhaps layering more elements, or even shrinking those which are less prevalent or important.

Expand
Now you should have a good process for getting started on your asset set. Start small and expand as you go. Create more pieces and add more details as they become relevant and you can be sure you are prioritizing the most important aspects of your pieces first. Keep expanding on your set and experimenting with different ways the pieces can be used, until you feel like you have covered all of the bases, and made the most robust and versatile set possible.
Resources
There are several resources you can find about creating modular asset sets. The internet is full of them. You can search 'modular asset' in Google image search and find limitless examples.
This Polycount list has a lot of useful breakdowns of modular asset sets.