The Making of Mishka
My name is Margarita and I work at “Animation Studio Skazka“ as Lead Groom Artist in Moscow. My duties include creating hair, fur, and feathers on characters and props for feature films. This is how I made Mishka.
Idea:
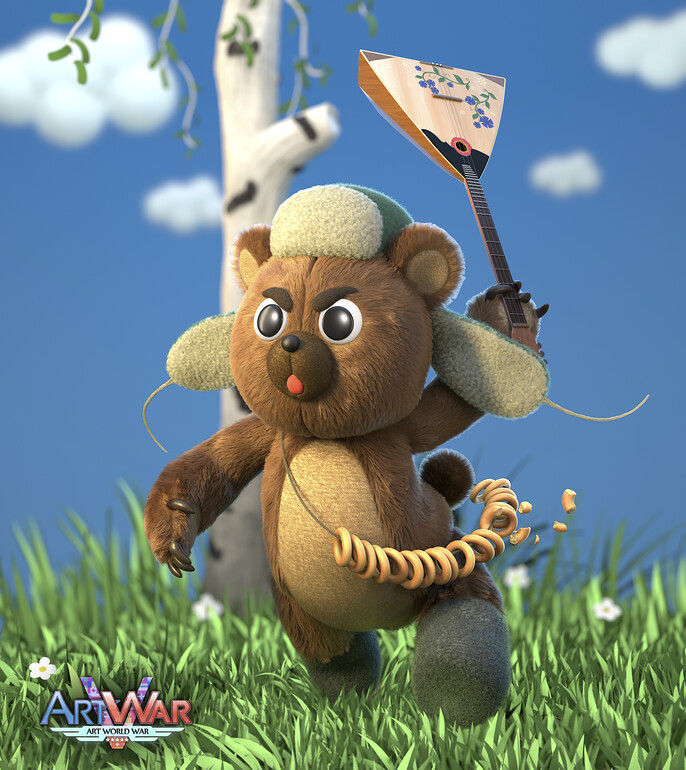
The task of the Art War 5 contest was to create a character that represents a certain country. In the end, I chose Russia. A teddy bear in felt boots with a balalaika. That's how I imagined the country I chose. My goal was to make a simple character. Because of the simplicity, I was able to put emotion into the character and work out the pose and lighting.
References:
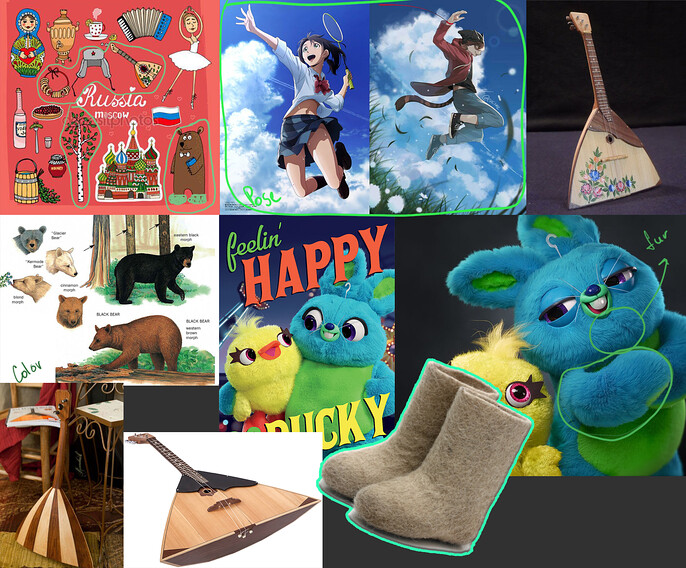
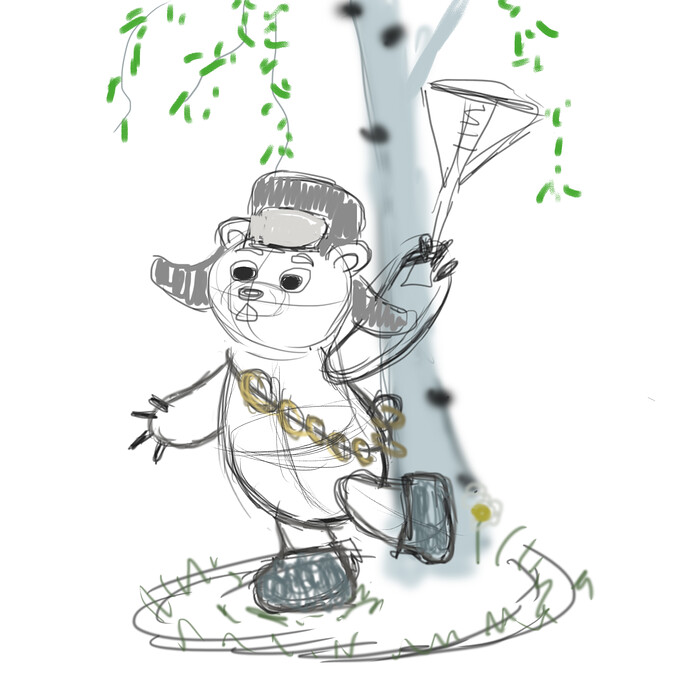
Since the bear is not only a symbol of Russia, I had to come up with something else. I found a great reference that shows the symbolism of Russia. That was enough for me to come up with my character. In addition to the references from the internet, I drew an approximate pose and how the teddy bear should look like.
The main thing is to imagine what you are going to do. Otherwise, it won't work.
Creating Geometry:
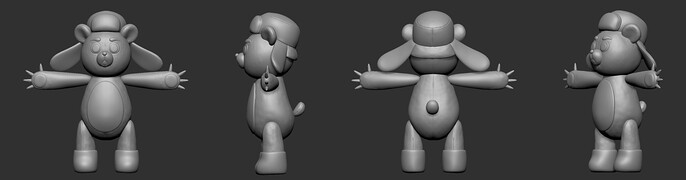
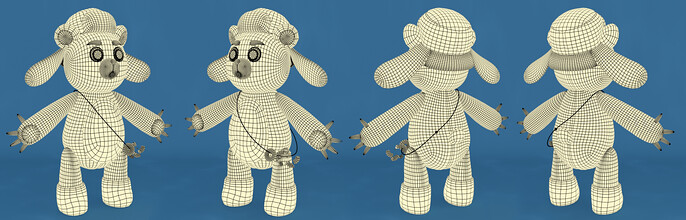
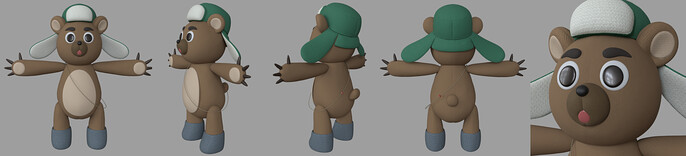
Teddy Bear.
I created the bear in Zbrush, then I did retopology in 3DCoat.
This is how the teddy bear turned out:
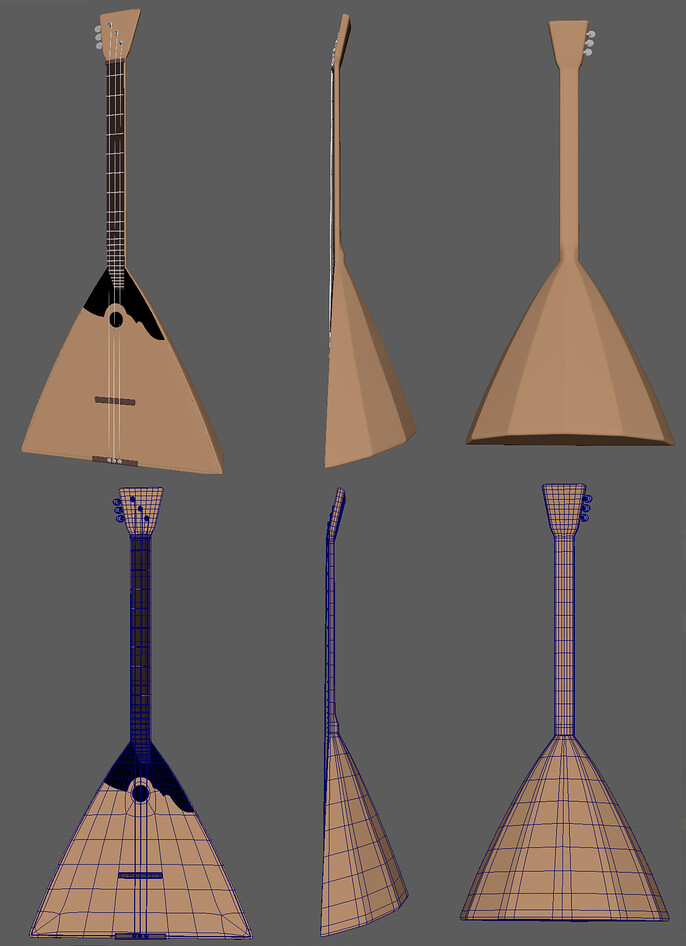
Balalaika.
I found a reference chart for the balalaika. Based on this and the references above, I got a nice balalaika.

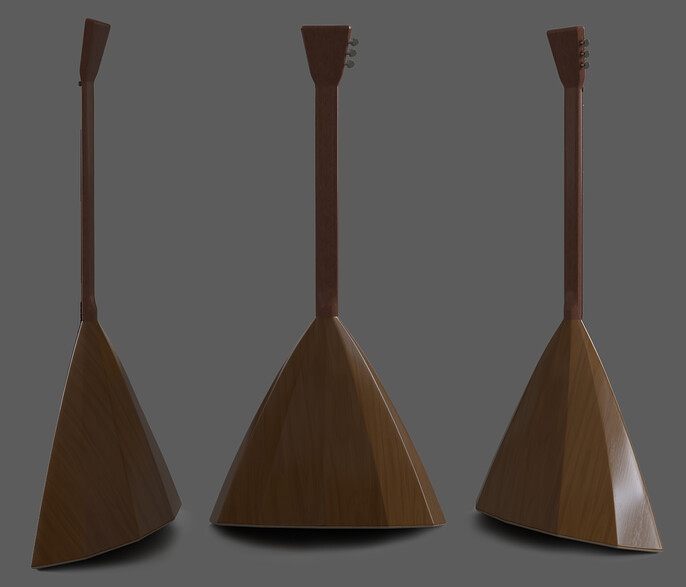
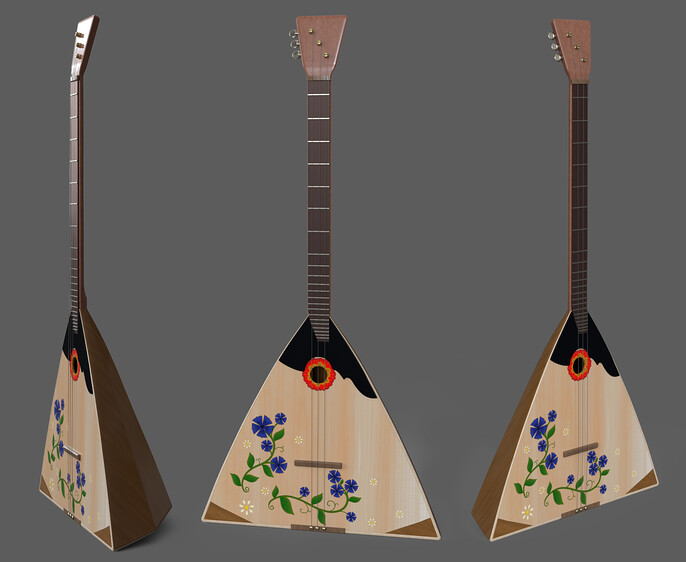
Materials:
I used Substance Painter to set up the textures, and Arnold was the renderer.
In my opinion, the hardest part of creating the balalaika material was coming up with the flower pattern. This I did by hand. The bear has only diffuse material, as the main material will be on the fur.
Fur:
I created the fur with Yeti.
My main reference was the plush toys from Toy Story 4.
Let's divide the teddy bear into three parts. This will be the body fur, the curls on the hat, and the other fur (felt boots, fuzz on the hat, belly, and pads on the paws). And further on, in more detail.
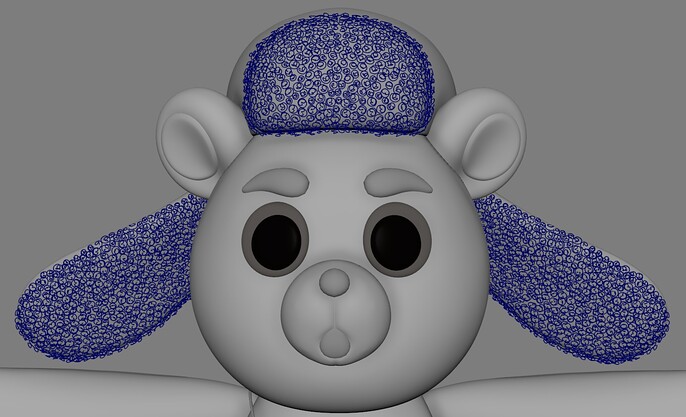
Body Fur.
I always start by combing the groom guides.
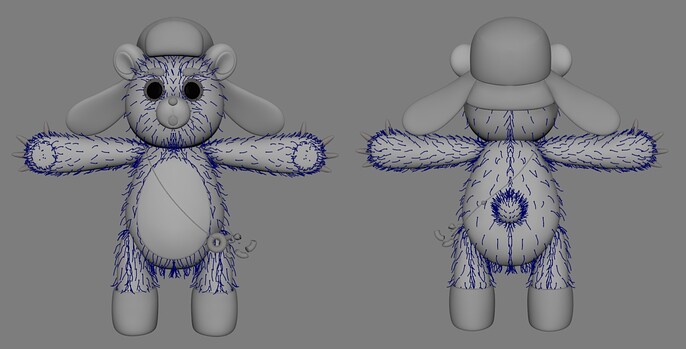
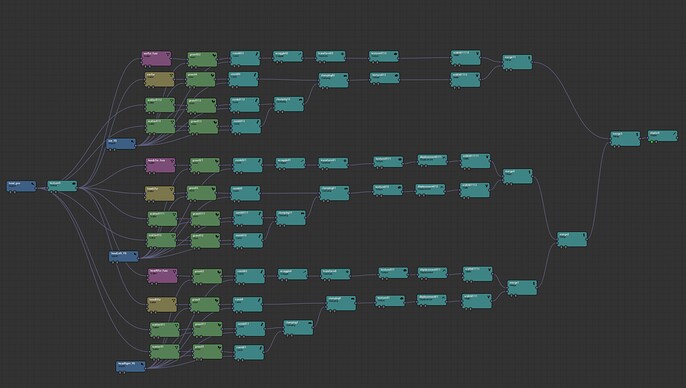
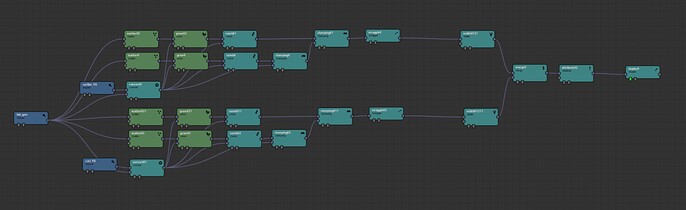
Next comes the setting of the hair. I split the hair into two halves to get a better seam. This is probably the most complicated version of fur tuning that exists. I adjusted each body half separately. It was very inconvenient to re-create the grooms for each side, but it was worth it. Here's what it looks like to customize the nodes in Yeti Graph (using the head as an example):
This is what I got with these settings in the viewport:
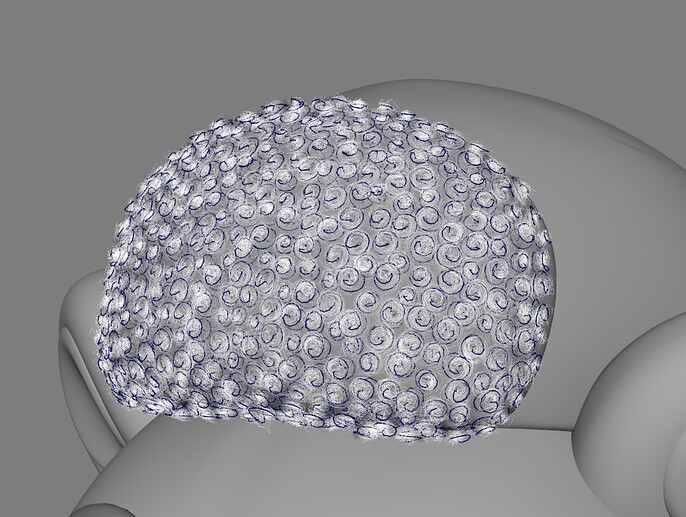
Curls on the hat:
How did I get curls on a hat? As always, I started with a groom. A simple twist setup won't have that effect, unfortunately, so I always do the curls with groom guides. I made some different twisted grooms and duplicated them. This is what came out in the viewport:
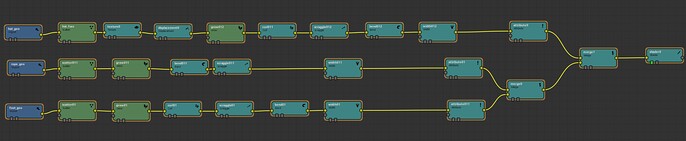
The settings for these curls are quite simple. The main thing is to do the grooming guides carefully. See Yeti Graph:
This is what I got with these settings in the viewport:
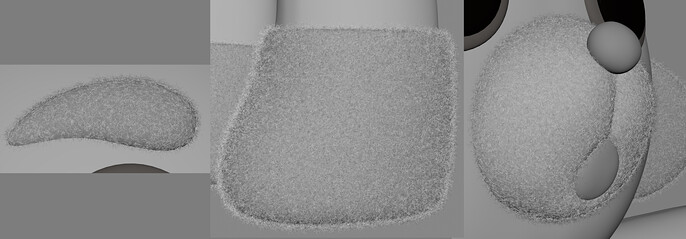
The other fur.
This is the easiest fur setup, which does not require combing the groom.
Immediately I show nodes in Yeti Graph and how such a fur looks in viewport:
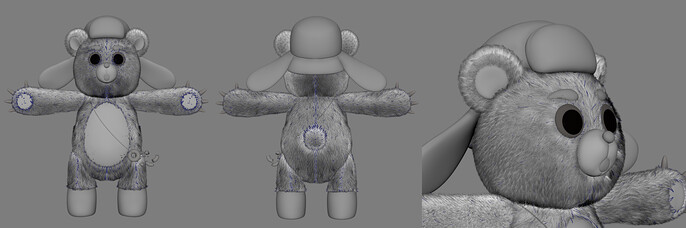
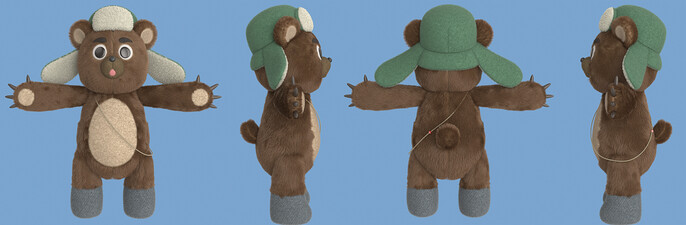
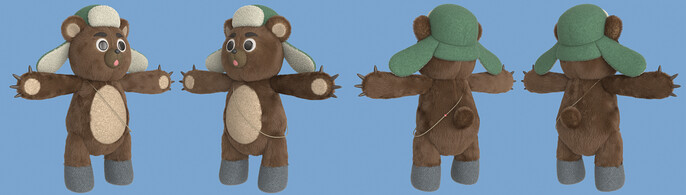
At the end of the fur tuning, I show renders with the fur materials tuned.
The pose and the pedestal:
I decided I was going to have an attack pose. The teddy bear runs waving the balalaika.
For the pedestal, I made grass and a birch tree in the VR program Tilt Brush. It's very convenient because it's like you're in the room and you plant each grass with your hands. And if you like any part of the grass you made, you can easily select that area and copy it to another location. I recommend it.
A little more about the pose. I made arms, legs, body, and head separately, so it was convenient for me to transform the pose. Then I corrected the pose a little bit in Zbrush, but mostly I worked with the tools and an interesting parameter in the camera "Film Gate" (this is a novelty for me) in Maya.
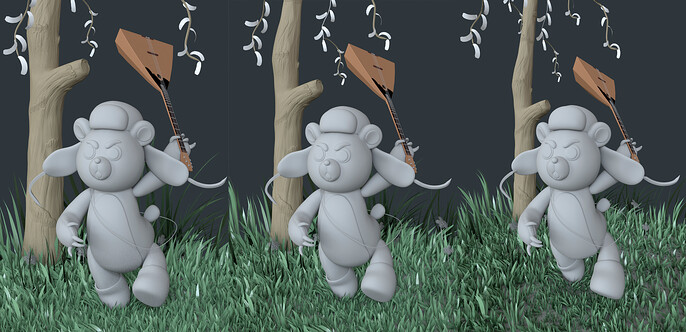
Thanks to this parameter, I did not have to change the pose any further. I show from left to right how the pose was changed by changing the parameter in the camera:
Finish:
Now the finish line and probably the longest process of the whole job.
Adjusting the lighting, assembling the image, color correction, and waiting for rendering.
The image assembly was done in Nuke with the help of cryptomatte. The most important tip:
When creating an image you should immediately think about how you will divide it into layers for color correction and rendering. "Immediately" meaning at the stage of creating the pose and the character (especially if it is a furry character).
I got 4 layers, which rendered a total of about 4-5 hours. The longest was the layer with the teddy bear. But when I decided to do a render with a scrolling pose, I didn't go near the computer for a week - because I rendered everything on one machine. It was horrible. But it worked out, and I'm glad! By the way, I got 12 light sources.
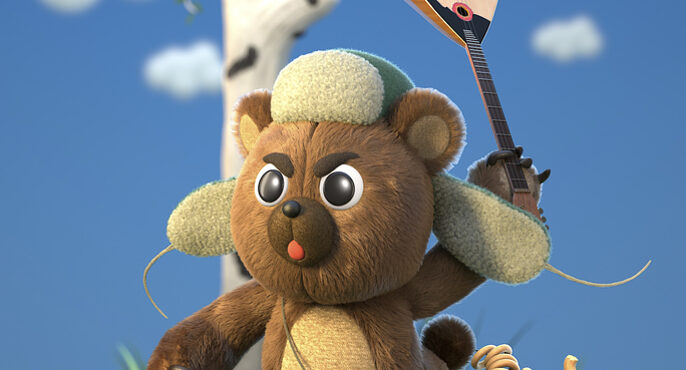
Here's my final render, and also attached a video of scrolling through the pose:
https://www.youtube.com/watch?v=eQ356QGlzhE
I want to thank all those who supported me, followed me, gave advice and tips. Thank you all! Through this contest, I figured out how to use passes, expose light, and how to organize my work to meet the deadline. Thank you Cubebrush for this opportunity.
Check out more of Margarita's work here: