Digital Painting Tutorial: The Making of AJABU
Hebron Priyo shows us how he integrated the Indonesian culture into his environment in this awesome tutorial: The Making of AJABU

Step 01: Understanding the Contest Rule
Before I started this image, I tried to understand the contest brief and make sure I didn't go too far from that. The contest brief said we had to make a new environment to merge the old and the new structures. In my imagination, it would be a completely new big city with some old structures or it could be a society trying to build a new place to live. However, there was only one limitation; we had to choose Sci-Fi or fantasy genre.
So, I composed my concept into a simple story:
AJABU
In the future, after a big war has been finished, there are survivors who are saved from big wars and decide to build new. Using the old ruined city as a base, they decide to build their home.
All in all, this is a new, and unfinished city above the old ruins where people who still have memories about how great the old days were. (A- Jabu)
I took the word 'AJABU' from a local traditional language in Indonesia, Batak language. It is originally composed by 2 words A and Jabu ("A" means one, and "Jabu" means house). Here I changed the meaning of house to a new hope/ home.
Step 02: Collecting References and Sketching
Before I started making anything, I tried to collect photo references. I separated between photo references and color references. Basically, photo references were used as a base of my design and color references were used as my color guide later.
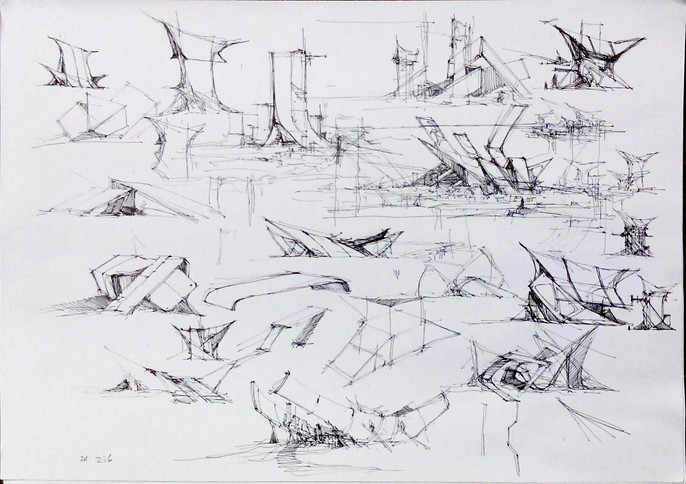
In this challenge, there was no limitation of art periods, histories or cultures. As Indonesian, I tried to explore my own cultures, then combine it with ruined buildings. Indonesia has a lot of cultures and every one has their own way of living, languages, religions, and architectures. After I had taken some hours seeking references, I chose to use Batak culture from Sumatra Island. Batak traditional houses have gorgeous cultures backgrounds, stories and the most important beautiful roofs. To combine with new structures, I also collected ruined buildings from Gunkanjima Island and Daniel Libenskind's buildings.

After I finished collected references, I grabbed my sketchbook to figure out my idea. During my sketch, I didn't want to go too far from references and the contest brief.
Step 03: Making 3D Blockmesh
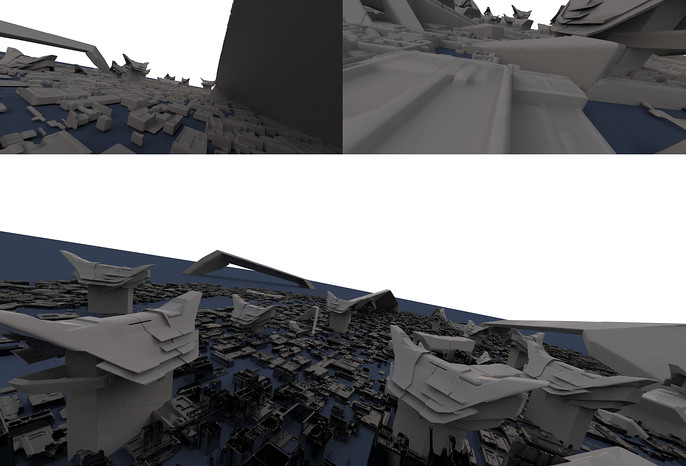
This step was rough but it had a lot possibilities. In 3D, I could play around with shapes, angles, camera lenses, proportion and basic lighting. So after I understood the stories, I started with a voxel sphere and stencils in 3d-Coat. Later, I brought it to Keyshot for scattering the objects and simulating the light.
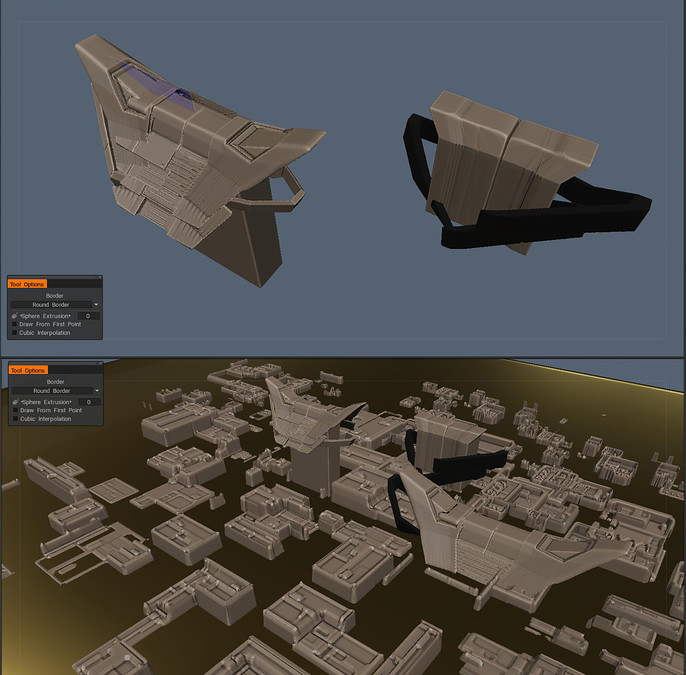
Inside 3d software, you could let your imagination go far. Sometimes in my experience, a happy accident would suddenly appear and guide you into new possibilities. After I am satisfied with the angle, I rendered in Keyshot and brought it all to Photoshop.
This was my happiest moment during the whole process. I started to drop pictures above my rendered layer, scaled it up or down, arrange it to become a good composition, then paint over the photos to become suitable with my concept. I also maintained the color balance and shape aligned with my references.

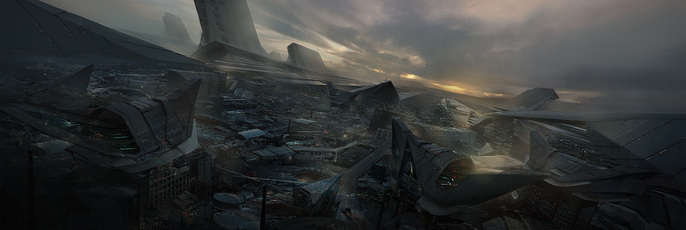
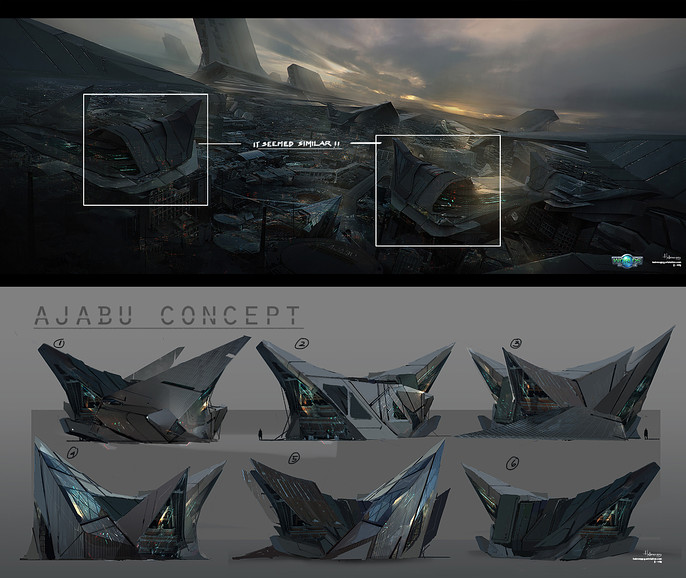
Here, I was trying to tell a story and arrange specific parts to become my focal point. I wanted this environment similar to an unfinished morning city, where the sun was ready to show its beauty but there were also some parts of old buildings.

Here, I found my main building looked similar and decided to redesign it.
As time went by I spent many hours polishing my final result. I also got a lot of feedback from my father and other participants. I was trying to hear and consider what they said to improve my result. All their opinions were good, however not all their opinions could mix together here. So… this is my final result.
