The Spanish Princess
My name is Irene Arnaiz Lopez. I'm a 3D artist born in Spain. When I started to think about what I wanted to be as an adult I was sure at a very early age I wanted to do something related either to video games or animation movies. The funny thing is that I was more focused on a 2D area. I liked illustration, comics, and traditional animation, but I had no clue about 3D or anything related to that area.
It all changed in my second year of university when suddenly I had this great teacher who showed me all the things you could do using 3D and my mind completely flipped. Since then I've been learning and developing as a CG artist. I had the chance to work in different areas as a rigger, modeler, compositor, and haven't stopped trying to become better since then.
I wanted to participate in the Art War V contest for several reasons. One of the more important was that I hadn't had the chance in my daily routine to develop 3D characters as I'm more focused on environments and props. That's why this looked like a great challenge to get back again into modeling 3D characters. Also, I loved the idea of competing around the world and be able to form part of the community. Overall it became a great experience–not only developing the character but also making sure I was documenting the development and watching other projects happen at the same time.
I'm very glad of discovering this challenge. When you get to see all the participants, not only 3d but also in the 2d category, you get the chance of learning so much from the different styles, techniques, and ideas.
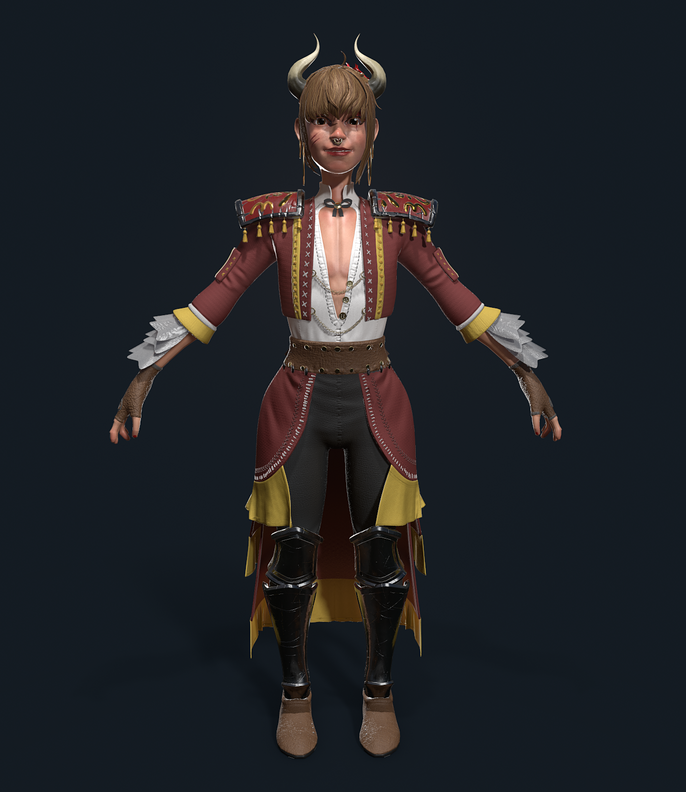
My country is Spain so I went directly to the iconic things that make the country recognizable.
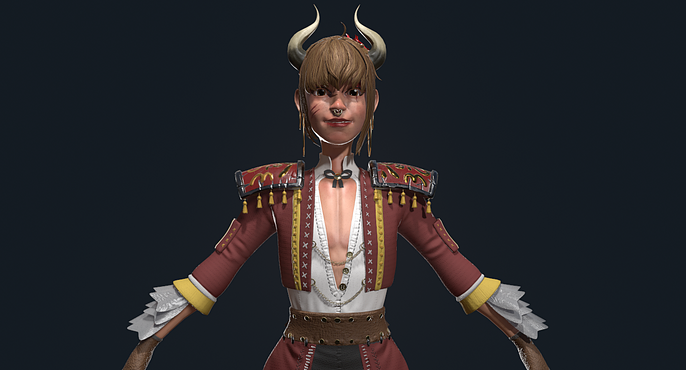
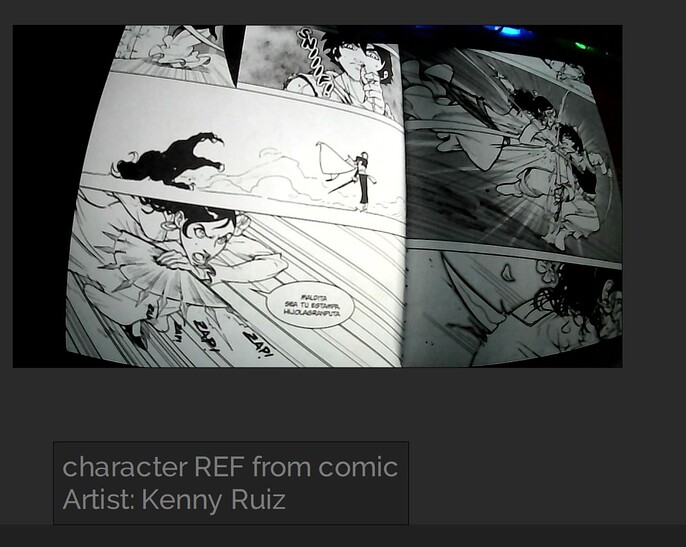
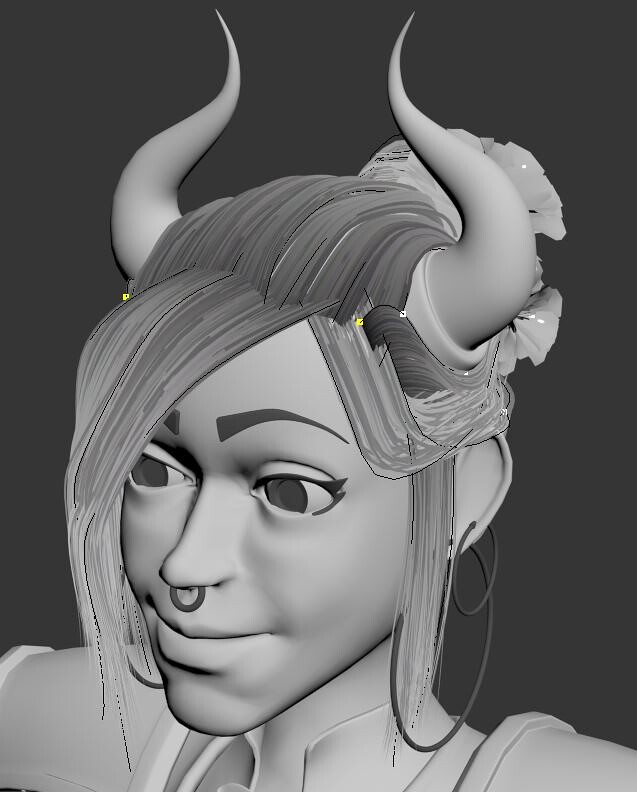
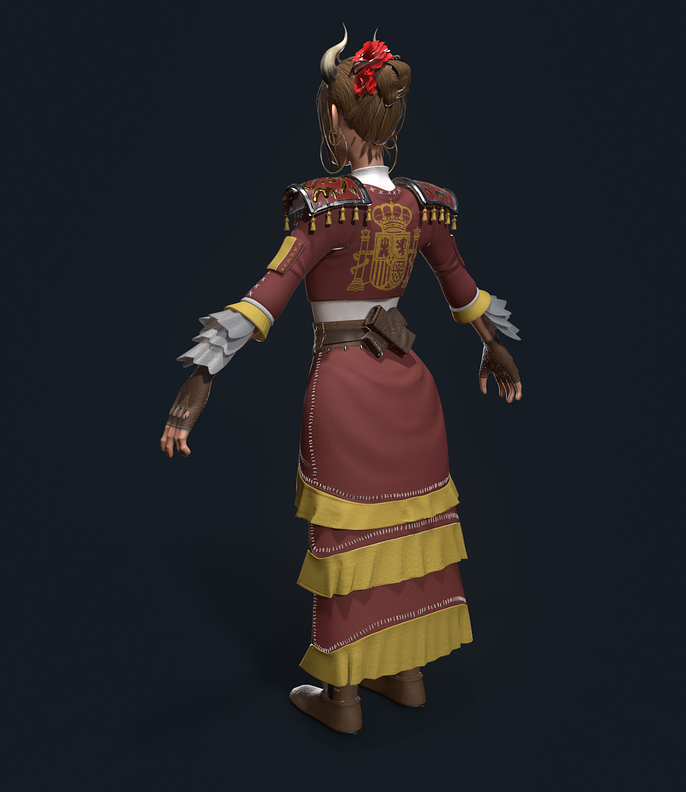
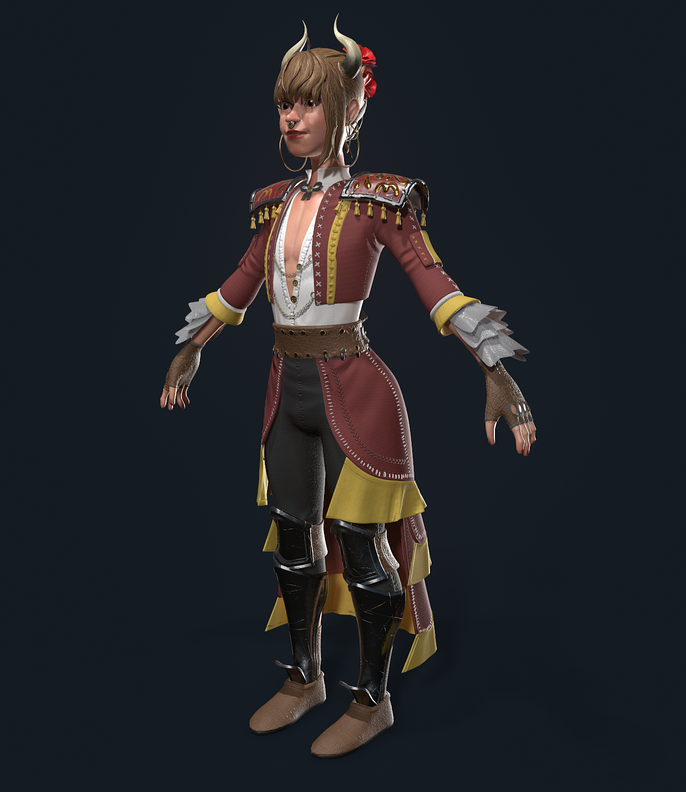
My idea was to make a Flamenca! It's not the most original idea but it was one of the first icons that popped into my head. I also liked this idea based on a concept of one of my favorite comic artists. Also, I wanted to give a little twist, adding the horns to emulate the horns of a bull. Basically, the animal that represents Spain. So I went on with that.
The thing that I really wanted to capture for the character was to put it in a typical pose of a Flamenco dance, that would look very dynamic and normally look like attack poses.
So after all the decision making it was time to start modeling! I must say I'm more of a list organizer than a visual. I had a list of things that I wanted to be included in the character like, horns, the jacket called “torera”, the Spain flag icon on the back etc.
LET'S START MODELING
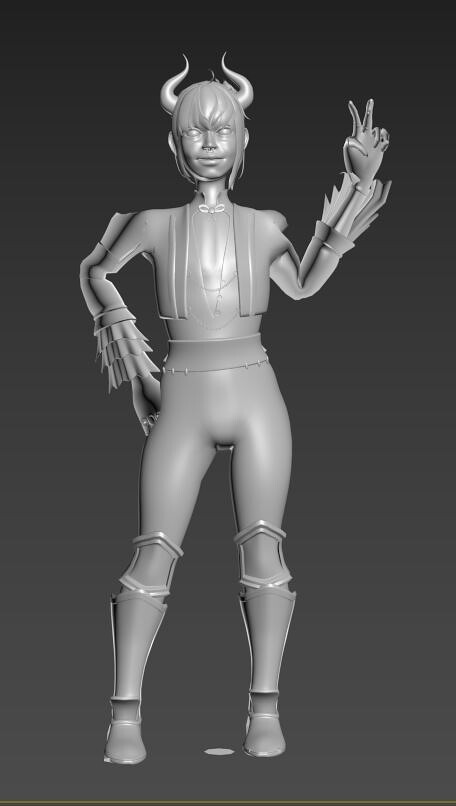
When I started working on the character the first thing I did was a base mesh. I normally have a few of them done to speed up work but I wanted to do one completely from scratch because I work more as an environment artist and it has been a long time since I did a base body, so it was a good challenge to remember myself the steps to cover when doing a body with poly modeling and not sculpting. In my case, I'm working with 3ds Max 2021.

Doing a body like this gives you a heads up into having later a good character with good topology.

BLOCKING AND DETAILS

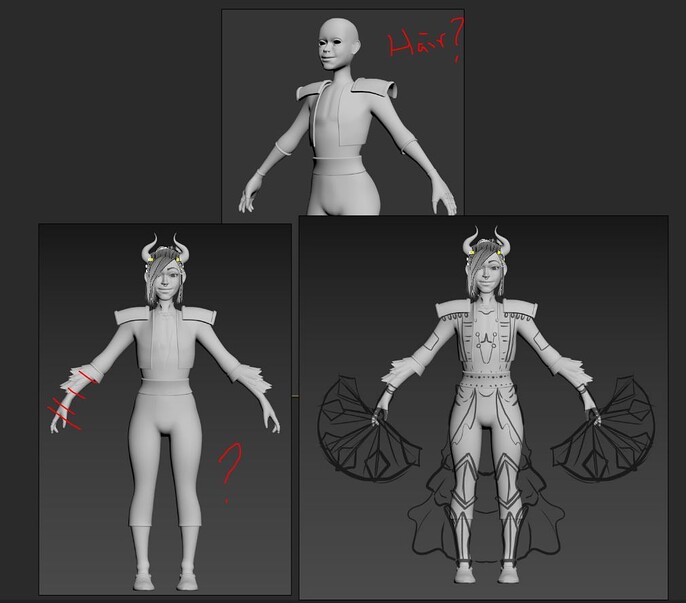
The process is a constant repeat. I tend to go from big blocks and then go to the details Like every process. Normally, as I'm modeling I start to make notes on the model to see what kind of details I want and where.
In the end, the base modeling and basic clothing is the kind of stuff you have to get done anyway so you may start developing that stuff at the same time you start searching for ideas. After I have the base, I start making decisions in order to have an idea based on something previewed so I can narrow my options and be able to put myself on a finish line and not go crazy with details.
The clothes were modeled directly on the character. I'm not very good with the simulation of clothing yet. At least not in a very complex way so everything was hand-modeled.
Note: I tried to make the hair first more with lines than full mesh but I really didn't like the outcome so it was something that was discarded.
FINAL DETAILS AND UV MAPPING
The unwrap was pretty straightforward. Everything is well organized, maybe into groups such as cloth, skin, metal, etc...
SUBSTANCE TEXTURING AND PROJECTING
The textures were mainly done with substance painters. I followed some tutorials for things such as painting the skin because I felt I needed a bit more work on that to give it a nice look. I also added the character model into Zbrush to sculpt some minor details such as the scratches on the face or some of the folds in the clothes, but very little detail.


RIGG A POSE
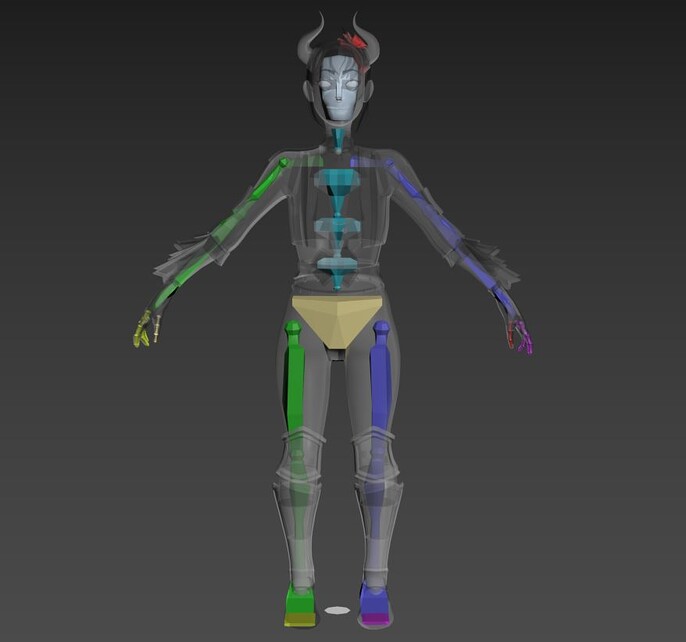
Coming from a video game background I'm still used to modeling characters in T pose and posing them afterward. There were several approaches related to how I wanted to pose this character. First I decided to do the MIXAMO trick, but the automatic rigging really deformed the final product and it wasn't giving me a good result. So I went for the second option which was to rigg it myself.
In 3ds max, there is a tool that is pretty handy called biped. It's like an already ideal rigg to make humanoids. It has a very similar structure as a skeleton and works similarly to it.
I added the skeleton to the character and then added a skin modifier on it to be able to skin it to the character. It was going to be a static pose so my approach to the weight painting was more based on the final pose than to make it a functional rigg.
Basically, I added a skeleton to it to give it a more dynamic final touch.

MARMOSET LIGHTING AND RENDERING
Rendering was done in marmoset. I used a very simple 3 point light system and just worked around the colors that were coming out of my character. The idea for the illumination was simple.

After working on the Tpose character I did the same job directly on the posed character so I only had to move the lights from one place to another without having to work any more on the values.
WITH PARTICLES IT'S ALWAYS COOLER
Real-time particles are very cool to give any static model a bit of movement. To make this I added a little plane in 3ds max and with my flow I made it go around a spline around the character. The tricky part is to make it animated inside the marmoset. The way it works is to export the animation into an alembic and alembic animation can be read by marmoset. It was just a matter of adding an emissive material and pump up the glow to give it a cool final touch!
FINAL THOUGHTS
So there it is. The whole work in progress took like a full two weeks in between free time at work. It was amazing to do something like this so I wouldn't lose my ability to make characters as well as backgrounds. It was a very fun challenge to do.
Something that I learned from making this was that I need to start making my list a bit more complete as I just did some previous planning and I ended up forgetting a lot of details that I wanted to add.
See the whole process here: