
Exclusive Tutorial with Cubebrush: The Making of Laureline
Hello everyone, my name is Artem Dorkhin, some of you know me as Artem Artificial. As I remember, I started making cg at the age of 14. I started working as a professional artist by the time I was 18.
In this article Ill try to focus on the most important aspects and details of my latest work - Laureline - Cara Delevingne.


Work Preparation:
Before you begin a project, you need to evaluate your personal skills and capabilities very competently. You need to stay motivated to clearly see your final goal. Sometimes if you take on a project that exceeds your skill level it can cause you to lose interest in your work and/or project. It can also happen the other way round, when you underestimate yourself the final results you get can be dissatisfying.
Collecting references is the first step after analysis and planning. This is very important stage of work, which should be given a lot of attention. For example, this is my reference tab at the start.

Over time, it took more and more references to clarify details:

I started modeling the most interesting part- the head.
Frankly, I'm not very experienced in anatomy and art sculpture, which explains why my final sculpted head was not anatomically correct and similar to the original person. Here some of sculpting stages:
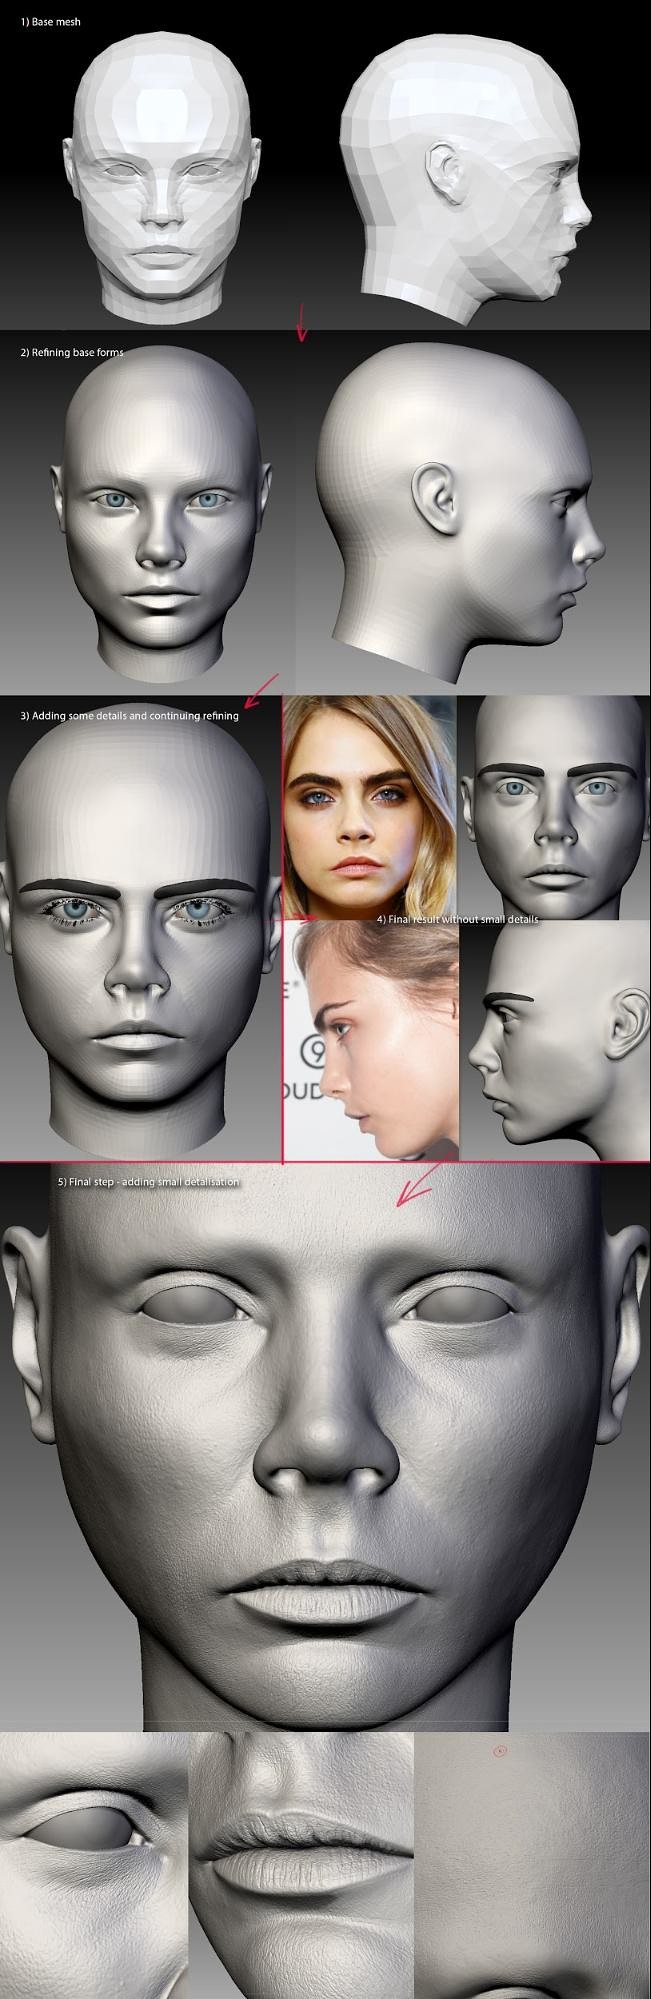
As you can see, I was changing my base form of her face from start to end. It was very complicated to copy her shape and translate it to my model.
I modeled half of the suit half in 3ds max and half in Zbrush. Her outfit under the armor was sewed in Marvelous Designer. It was just a regular hard surface modeling. Since it was for a static frame I did not have to worry about polycount and topology.

Shading/Texturing:
For the texturing I used Mari. First I baked multiple masks and maps from my hipoly in Zbrush, such as Cavity, AO and Smoothness. Next, I start to project albedo map of human face in mari, then hand painted it. From output I got these maps:
Albedo\Diffuse

Bump map for small wrinkles and pores

Specular

Glossiness

This is what my shading network for the head looked like. I must note, that for this work I was too lazy to make 3 individual layers of sss for the skin which is why I just replaced them with the usual Color Correction nodes.

The eyes were most interesting. To create a realistic eye, you need to follow certain rules and try to imitate the natural counterpart.


- The eye must be anatomically correct (i.e. the right size, fitted correctly to the eyepit and the correct size of iris and pupil relative to the luminosity). The geometry is just as important, it can not be an ideal sphere in any way. Usually the eye is slightly convex in the area of the iris, and the body itself is flattened in front and behind.
- To make the eye wet or to imitate tears I add a small geometry between the eye and the lower eyelid. The main take away is not to overdo it.
- Eyelashes of the right size emphasize the eyes and the incision of the eyes
- I created vitreous humor with the SSS effect because the eye is strongly translucent in the side lighting.
- Finally, the second layer - cornea. It is a reflective surface with the IOR just above the glass.
Lighting/Rendering
Light scheme stayed standard throughout the project. I did not try to make a complicated composition or complex light scheme, as I did it at my work with Nick Valentine. Light is the most common for a portrait.


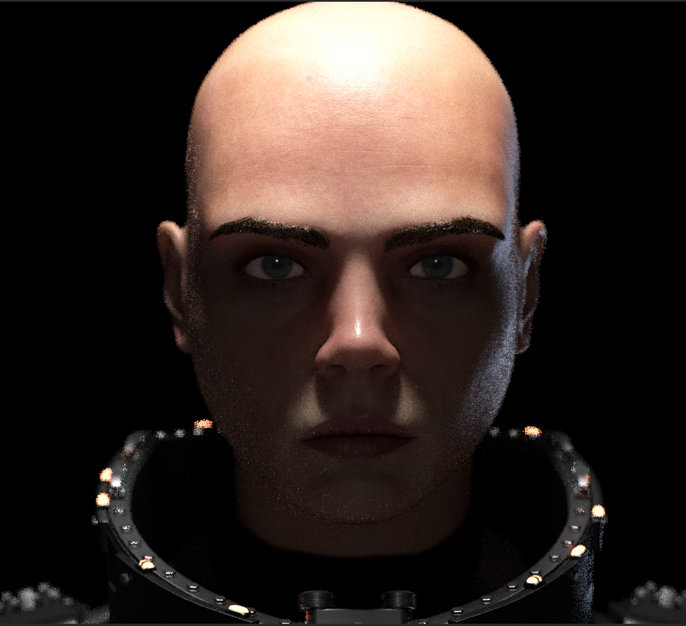
In the process of work I slightly rebuilt the light scheme but the essence remained the same. Sometimes it's worth doing this to better understand how different surface shaders behaves. It was necessary to leave only one light source for understanding the behavior of the surface. Here are some "in progress" renders:


Rendering wasn't too long, about 5 minutes per test. The image resolution, however, was pretty high - 2560x1440. It consumed 30 minutes around on the final image because the model is quite heavy, had a displacement and a fairly large number of hair.

I decided to render a final model from the different angles and with DOF. I'm not a compositing guy, that's why I like to create all the effects on the render, as maximum as it can be done. Here you can see the final render settings:


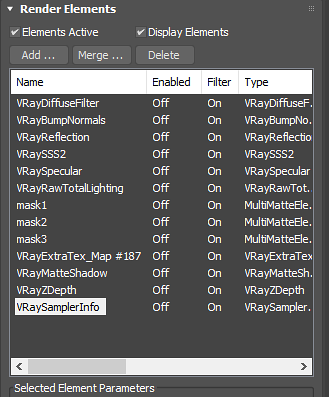
The final image ware rendered with these render elements. I don't use 80% of them, but, nevertheless, I have a habit of rendering everything that might be useful.

As you can see, my compositing project was quite primitive. I like to duplicate a beauty several times, blur it to different values from 10 pixels to 140 and overlay with the "normal" blending mode with an intensity of 4%-7%. This gives an interesting diffuse effect between pixels and also a small glow effect. I'm also fond of imitating the film, so I added an S curve and some film noise with the chromatic aberrations.
I tried to disassemble all aspects of my work, from beginning to the end. I hope you were interested, and you learned something new for yourself!
If you have any questions, you can message me on Facebook Additionally, all of my works are posted here